Weaving with Leather Handles
Over the past 26 years of weaving, Joanna’s Collections baskets have developed a certain style. One of my favorite characteristics that we incorporated into our baskets is the use of leather handles.
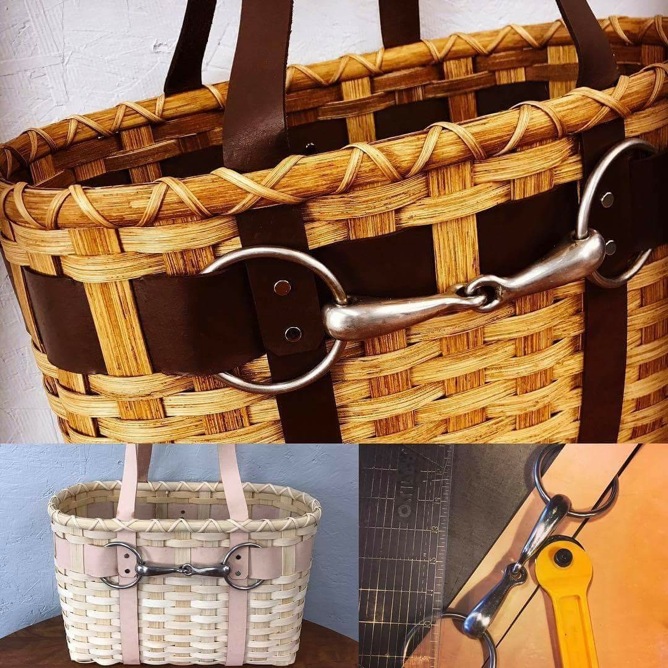
From bushel handles on storage baskets to leather strapping for totes, adding the different texture of leather to the rattan reed makes for a delightful and useful contrast in the finished product.
We live near Duluth, MN, so we’ve been making trips into the Duluth Pack Store for years. Walking through the store and seeing/smelling the leatherwork on their totes or purses served as inspiration for earliest inclusion of leather handles and strapping in our baskets. We started purchasing scrap leather from the Duluth Pack Store, but it didn’t take long to realize we would need to increase the scale of our purchasing in order to meet the creative and selling demand for more leather.
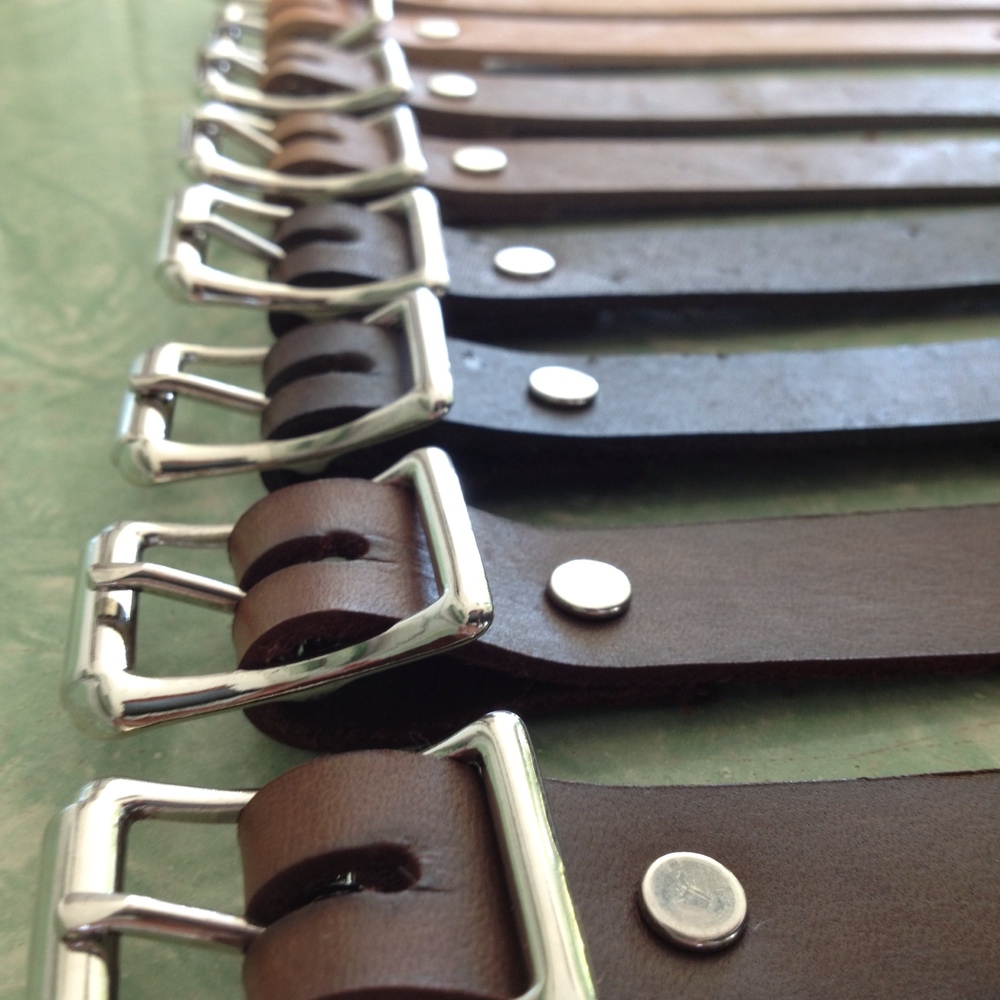
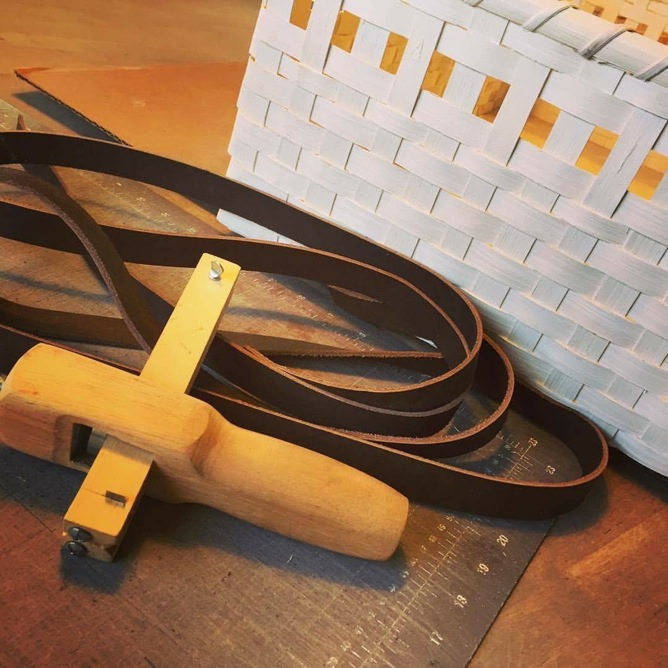
Now we purchase whole cowhides at a time and strip it down into the sizes we need for our patterns. Any leatherwork from Joanna’s Collections has been custom-designed, manufactured, riveted, pressed, and stained by hand in our shop.
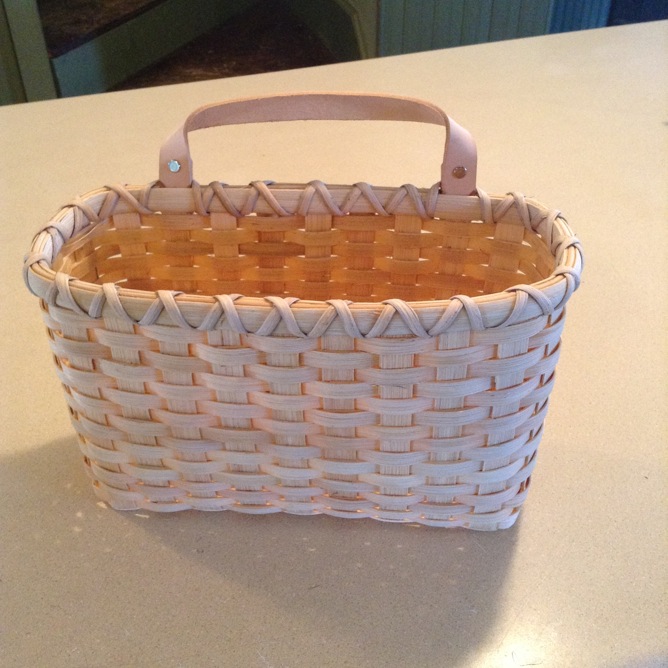
So if you’ve purchased any of our kits with leather handles, here’s a tutorial for you! This tutorial will show you the way we incorporate those handles into the rimming process of weaving. I’ll be using a Large Mail Basket as the example in the photos below. (The principle is the same and can be carried over to many different designs to fit the specific requirements of the pattern.)
In this pattern, you weave your allotted number of rows for the sides except one.
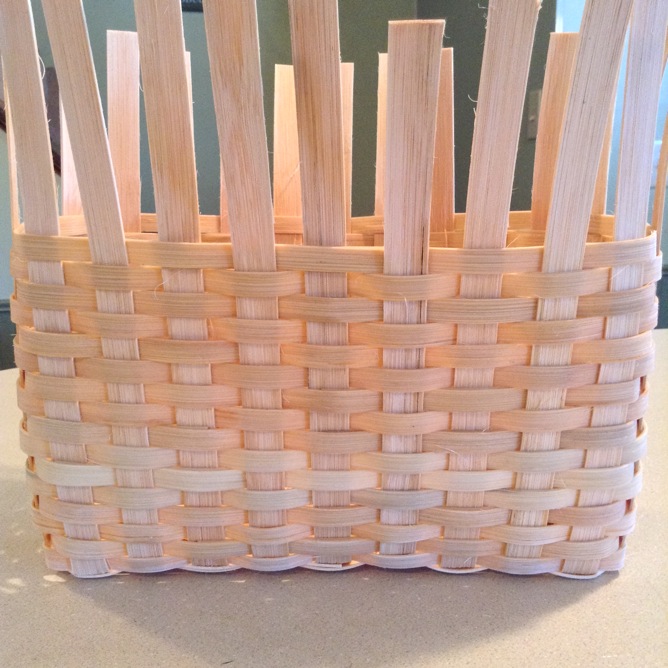
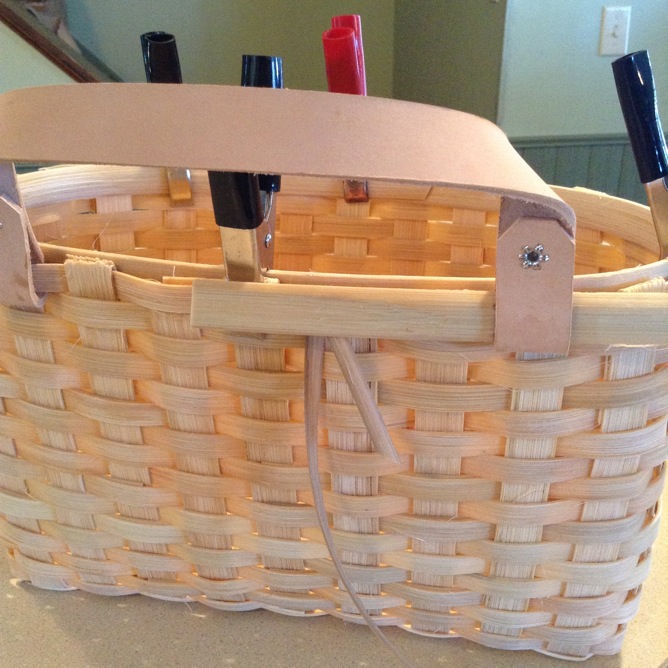
The pattern tells you to weave the last row, being sure to include the leather handle. On the Large Mail Basket, there is one leather handle that belongs on the back of the basket. Begin weaving the last row like normal until you get near the place where the handle is supposed to be inserted.

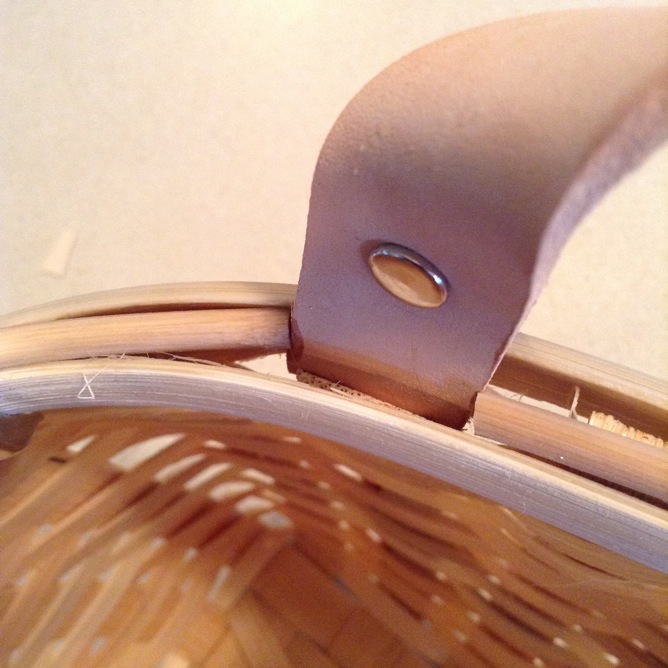
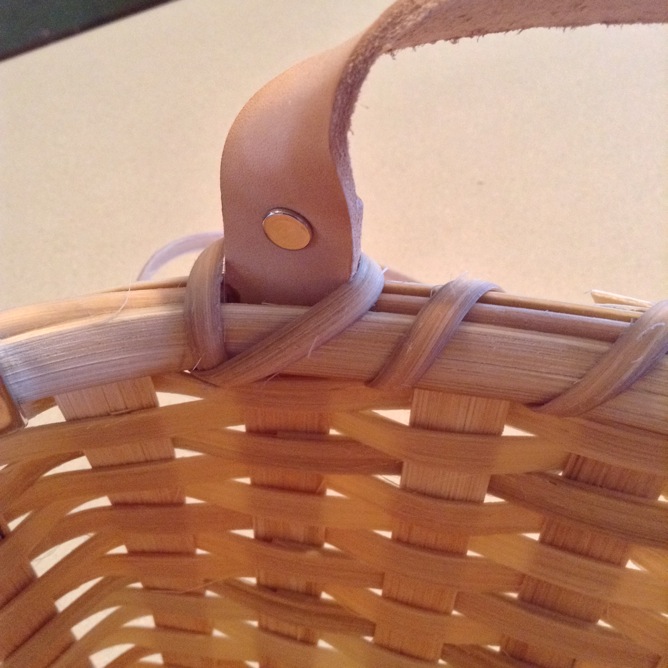
Make sure the riveted sides of the handle face out from the basket. I call those pressed rivets the “daisies.” Make sure those daisies are facing the outside, and in this case, the back, of the basket. This is the correct positioning of the handle slipped on the last weaver; daises out!
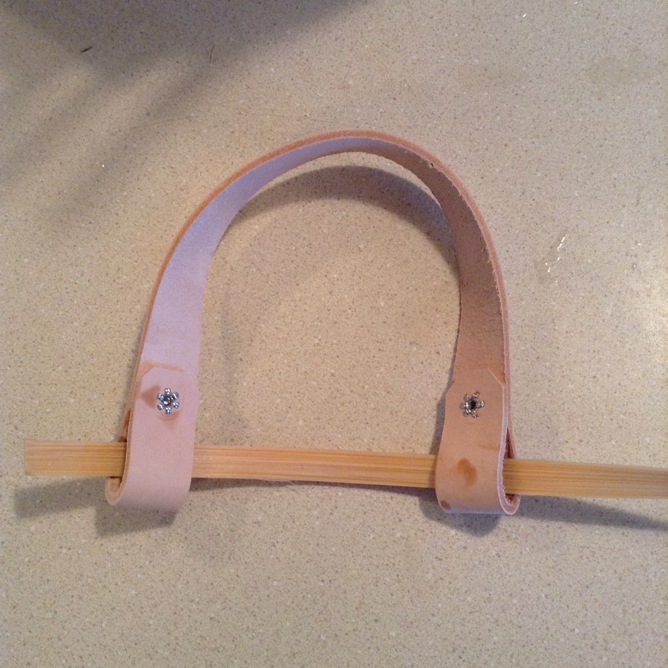
For my pattern, I started the last weaver in between the two ends of the leather handle. I slid the right end of the handle onto the weaver and lined the end of the handle up with the correct stake.
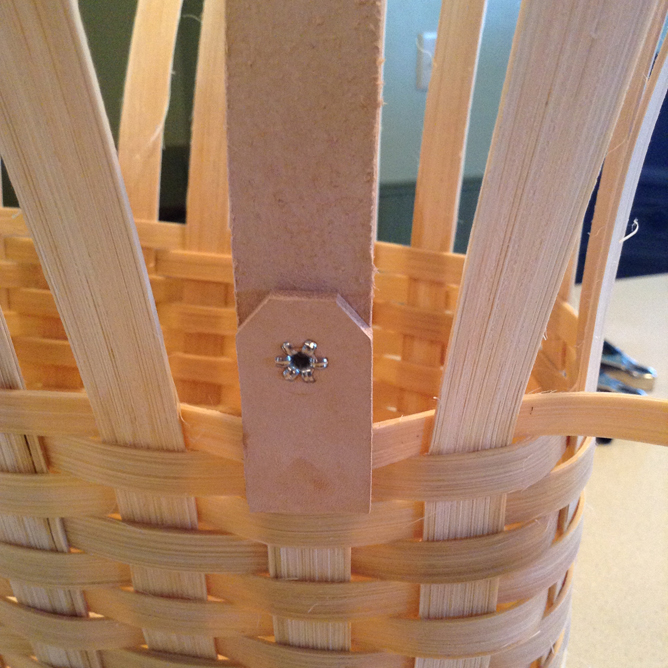
In this case, the ends of the handles have five stakes in between them. Usually, the handles should be positioned in line with a cut stake rather than a tucked stake.
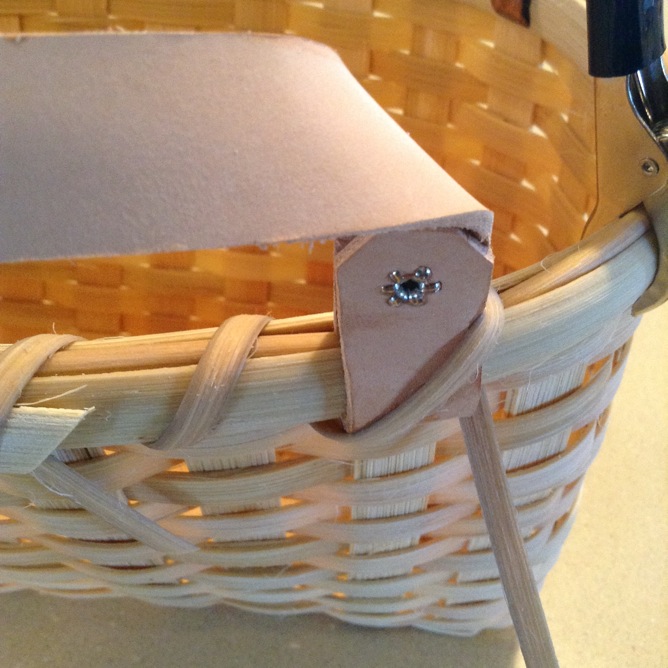
Clip and tuck the stakes like normal. The only change is that some of the cut stakes will need to be pulled away from the leather handles and clipped carefully at or below the height of the last weaver.
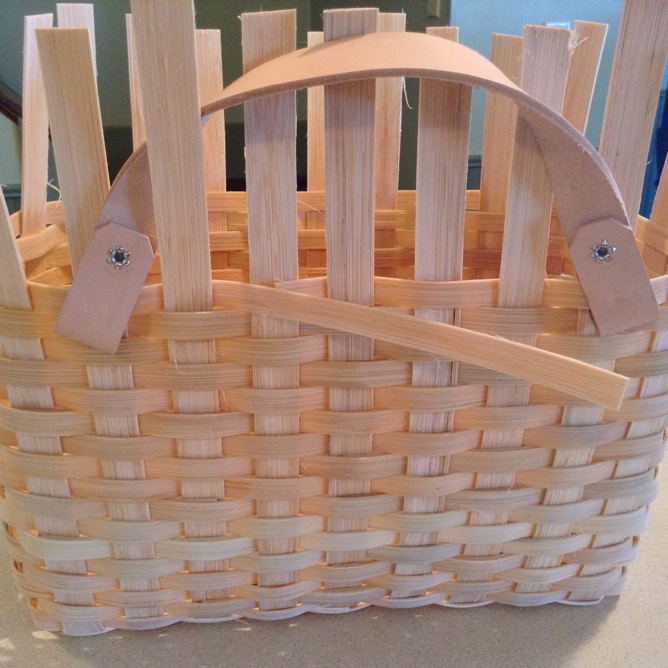
Next step – rim it! If you’re using two bushel handles, begin the rim on the sides that don’t have the handles. For one handle, like in the Large Mail Basket, begin the inside rim on the opposite side of the handle. Start the outside rim piece in between the handle ends.
When you’re ready to position the outside rim piece, be sure to slip the rim through the loops on the leather handle.
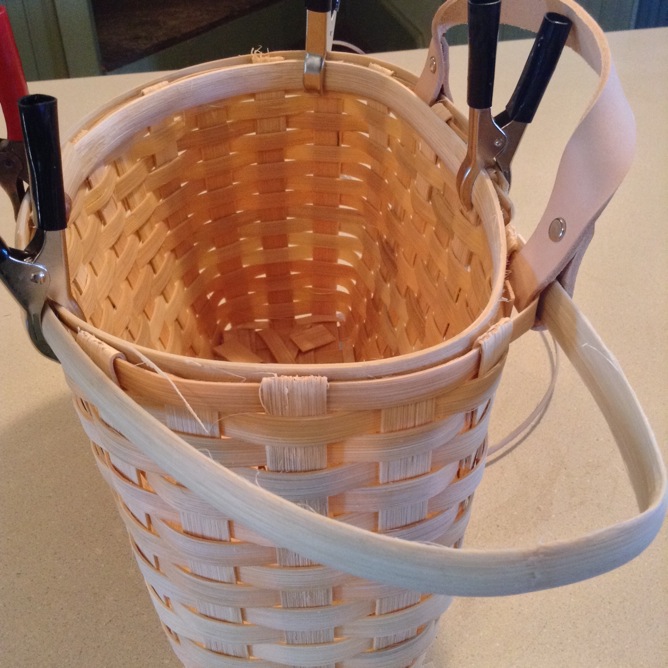
Hold everything in place with hippo clips or clothespins.
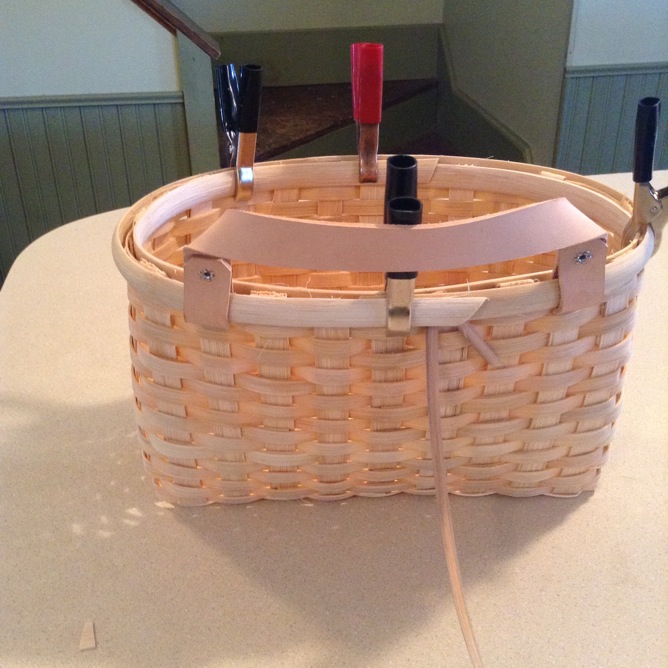
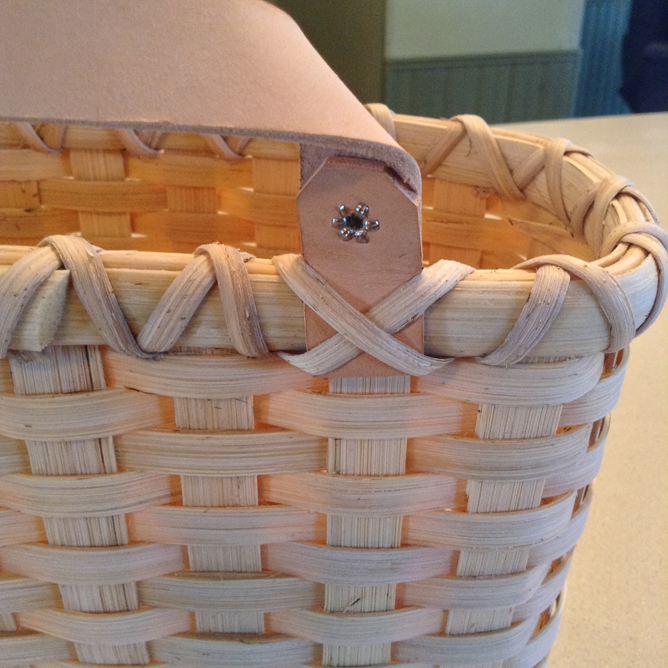
Now it’s time to add the rim filler. It’s important to make sure the ends of the leather handle are lined up with the cut stakes. Often times, they wiggle out of place when you put the rim pieces in place, so double check! Whether using round or seagrass, butt one end of the filler up against the side of the handle loop. Pin it in place between the rim pieces until you reach the next handle end.
Clip the round to fit tightly against the handle. Repeat as many times as you have spaces between handles. In this basket, the rim filler needed to be cut in two pieces – one short and one long. If you’re using bushel handles, you’d piece the rim filler in four sections – two short between the handles and two long from handle to handle.
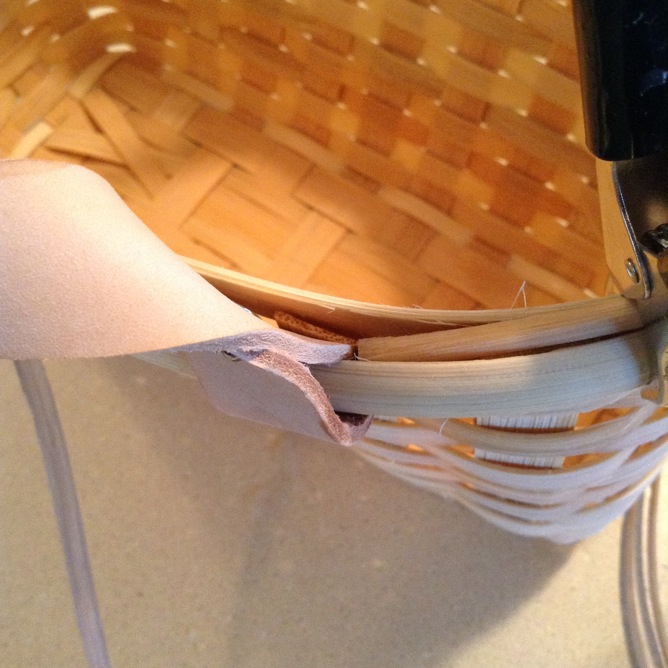
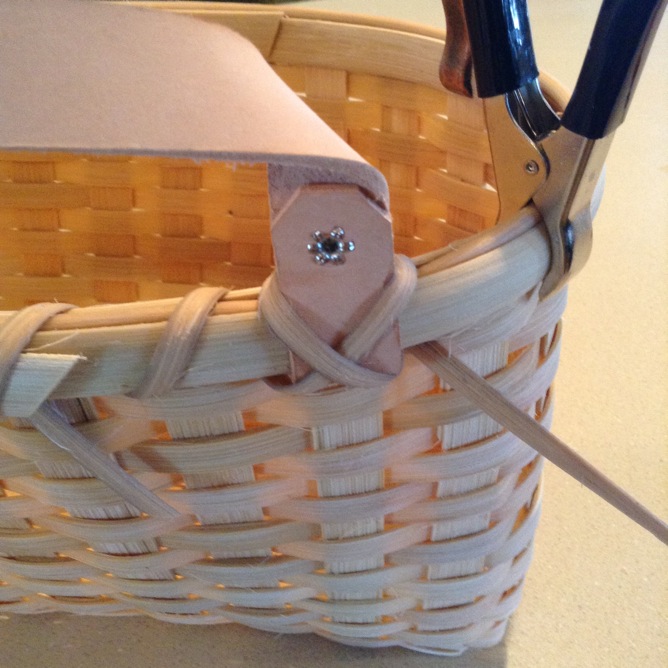
Begin lashing by whip-stitching as normal until you reach one of the handle ends. Most of our patterns double-lash the rim if leather handles are included. If you’re double-lashing, simply lash up and over the back of the handle end as pictured below. Continue lashing until you reach the next handle end.
When you get back to the start, it’s time to tighten the lasher. You’ll have to pinch hard to make sure the rim pieces are as close as possible, sandwiching the handle in between. Then turn around and continue lashing the opposite direction. The lashing over the handles will form that “x” as pictured below.
Here’s the alternative look for single-lashing the rim around a handle end. First, lash over the handle and come out the next space. Then cross back around the handle to form the “x”.
This is what the single-lashing looks like from inside the basket.
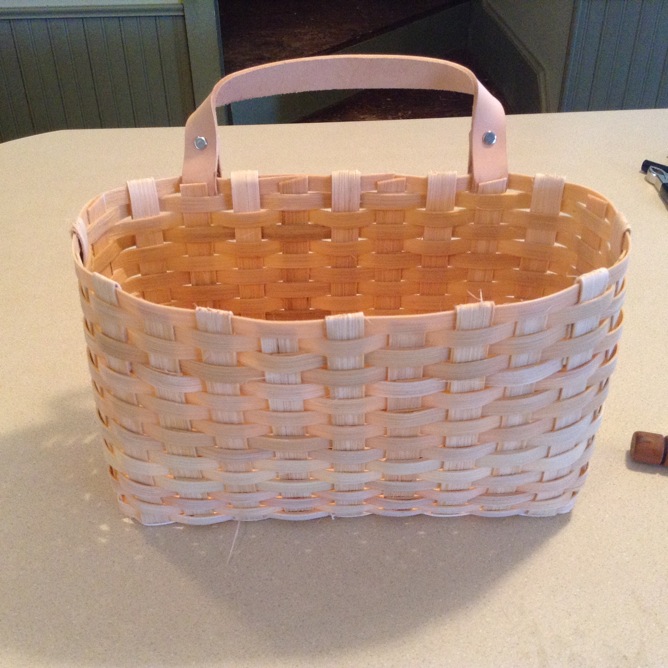
Finish lashing as usual, and you’re done! Happy weaving!
Recent Comments
Share This


Recent Entries
- Basket Finishes
- June ‘25 Free Pattern
- May ‘25 Free Pattern
- April ‘25 Pattern
- March ‘25 Pattern
- View Archive
Categories
Weaving Lessons
- Basket Finishes
- Staining Tutorial - With or Without Leather
- Weaving with a Wooden-Bottom Base Tutorial
- Wire and Bale Handles
- Weaving with Leather Handles
- Twining a Round Base Tutorial
- Leather Handled Tote Strapping Tutorial
- Singeing Tutorial
- Twining the Last Weaver Tutorial
- Sea Grass Continuous Weave Tutorial
- To stain or not to stain … that is the question!
- Shaping the Sides of a Basket Tutorial
- Double-Lashing Tutorial
- Clip and Tuck Tutorial
- Weaving the Sides Tutorial
The Basket Blog
Basket Finishes
June ‘25 Free Pattern
May ‘25 Free Pattern
Details & Such
Teaching Schedule
Danielle teaches many classes throughout the school year in various places in eastern Minnesota. For more information and a schedule, see Danielle's Teaching Schedule, or .(JavaScript must be enabled to view this email address).
Wholesale Inquiry?
If you are interested in wholesale pricing, please .(JavaScript must be enabled to view this email address) that has "wholesale inquiry" in the subject field.
Contact Information
.(JavaScript must be enabled to view this email address)
1422 Martha St N
Stillwater, MN 55082

Weaving Lessons
- Basket Finishes
- Staining Tutorial - With or Without Leather
- Weaving with a Wooden-Bottom Base Tutorial
- Wire and Bale Handles
- Weaving with Leather Handles
- Twining a Round Base Tutorial
- Leather Handled Tote Strapping Tutorial
- Singeing Tutorial
- Twining the Last Weaver Tutorial
- Sea Grass Continuous Weave Tutorial
- To stain or not to stain … that is the question!
- Shaping the Sides of a Basket Tutorial
- Double-Lashing Tutorial
- Clip and Tuck Tutorial
- Weaving the Sides Tutorial
There are no comments yet... You could be the first!