Twining a Round Base Tutorial
Twining a Round Base Tutorial
Both the filled and unfilled base tutorials we have shared on our blog have taught how to make square or rectangular basket bases. But what about the round patterns?
The basic way to make a round base is to use stakes as spokes and twine with #3 round reed. This tutorial will take you step-by-step through that process.
1. Soak all of your stakes and pieces of #3 round reed in warm water for several minutes until they are pliable.
2. Find the rough sides (the side that splinters when you bend it) and mark the centers on the stakes.
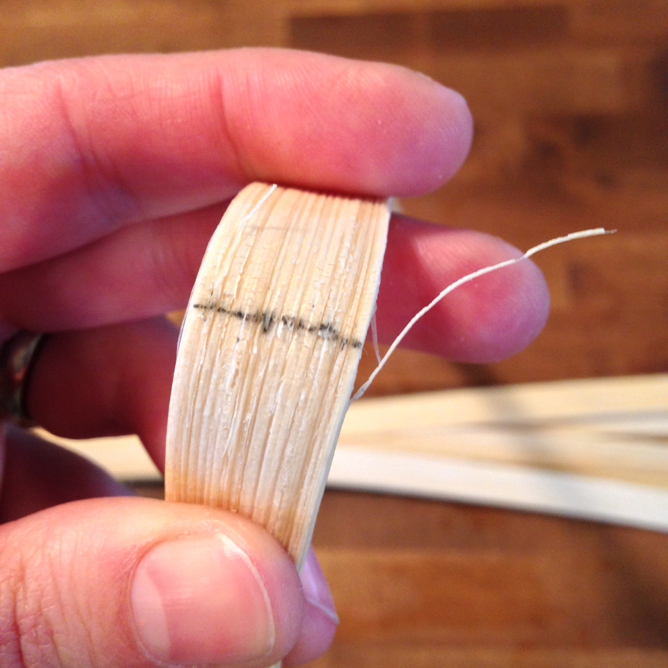
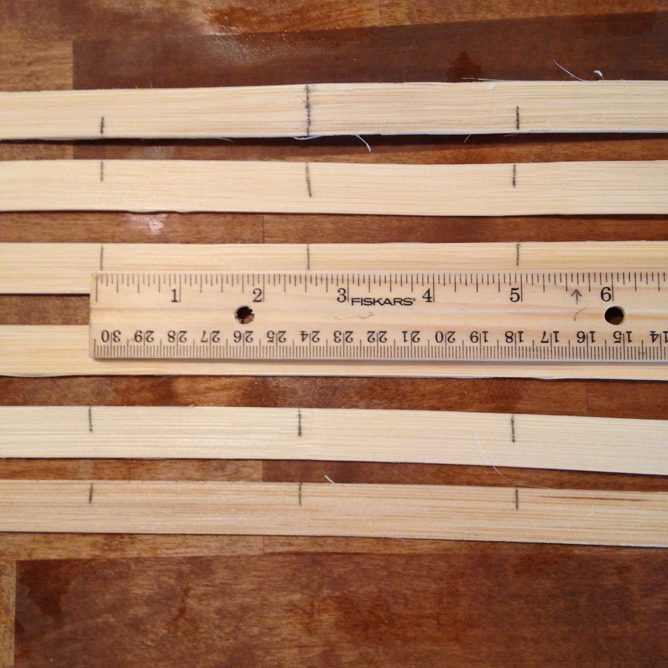
3. Most of our patterns require using only half of the stakes to begin twining right away. This makes a tighter circle during the first row of twining. Each pattern will also give the measurements for creating a small circle with the spoked stakes. Check your pattern to see how many stakes to begin with and the measurement to mark on those stakes.
The pattern for this Embroidered Basket says to mark the first six stakes 2 ½” to the right and left of the center mark.
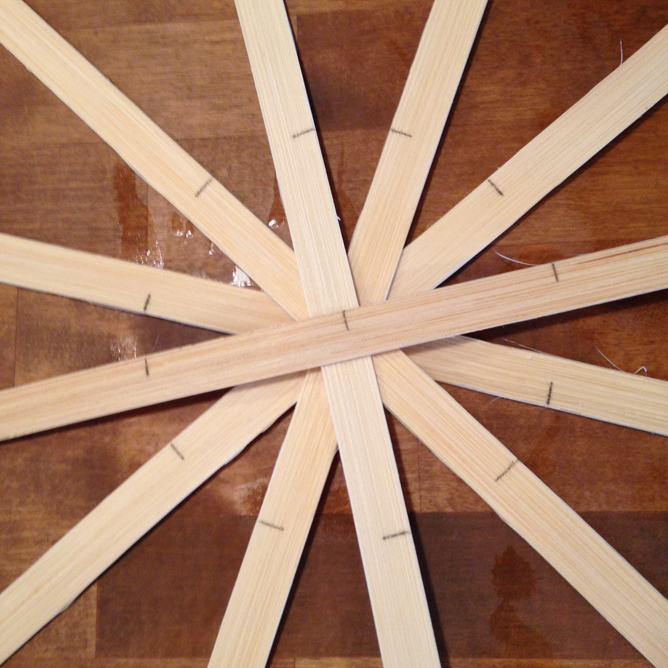
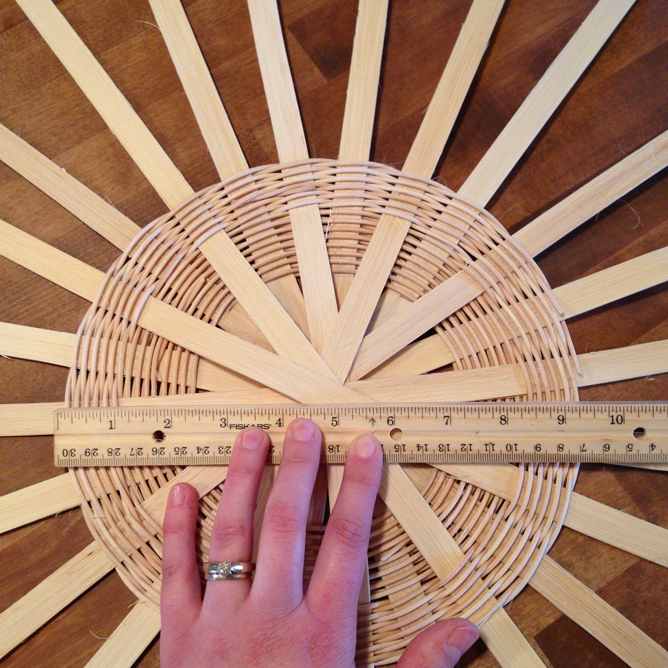
4. Arrange the marked stakes by overlapping the center marks to create (in this case) a 5” circle with the outer marks. You can either lay out the stakes in a clockwise or alternating – opposite directions each time – pattern.
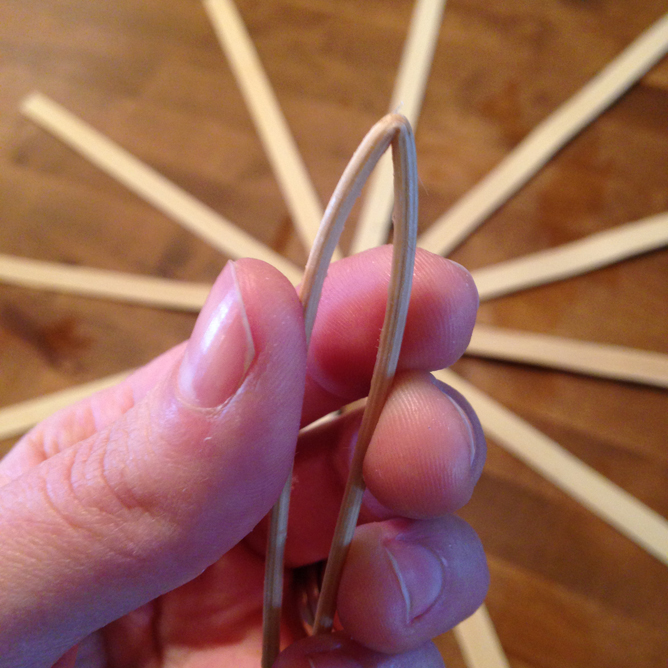
5. Now fish out a long piece of #3 round reed to begin twining. You are going to crimp this piece at not-quite-in-half. One tail should be about a foot longer than the other. It’s important to crimp the #3 reed by pinching it with the back of your snips or a pair of pliers. If you attempt to bend it in half, it tends to snap.
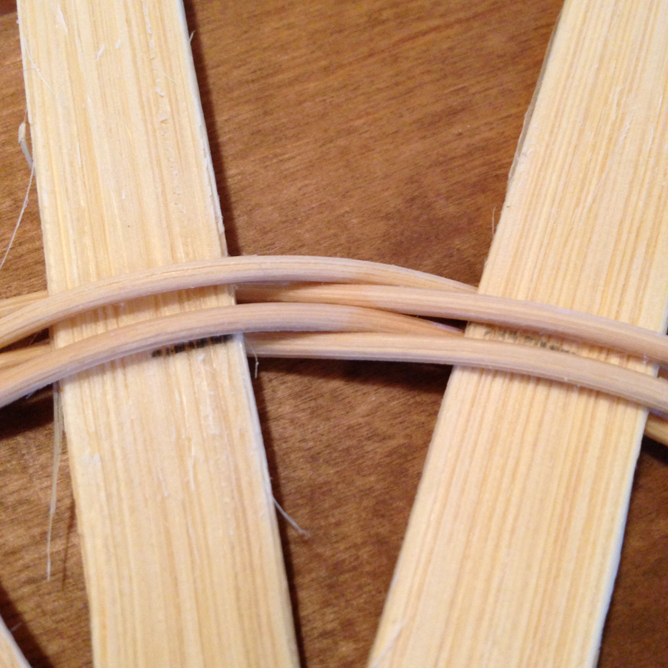
6. Place the crimped #3 round reed on any stake towards the top of the spokes – it doesn’t matter which one you start on.
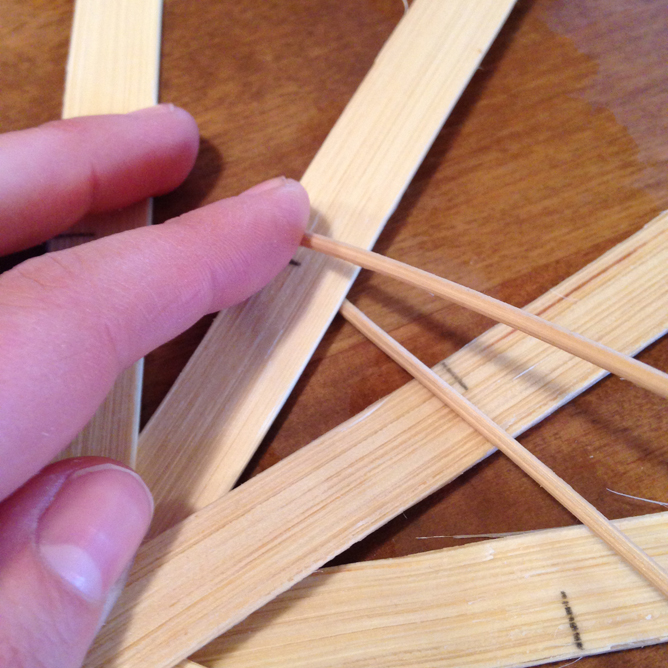
Helpful hint: As much as possible, keep one hand planted firmly on the arranged spokes. They tend to move around, but you want to keep them anchored in the nice circular shape you labored over ☺
7. Now you have two long #3 tails hanging down to the right side of the circle. Twining is the process of ALWAYS weaving the top twiner behind the next stake.
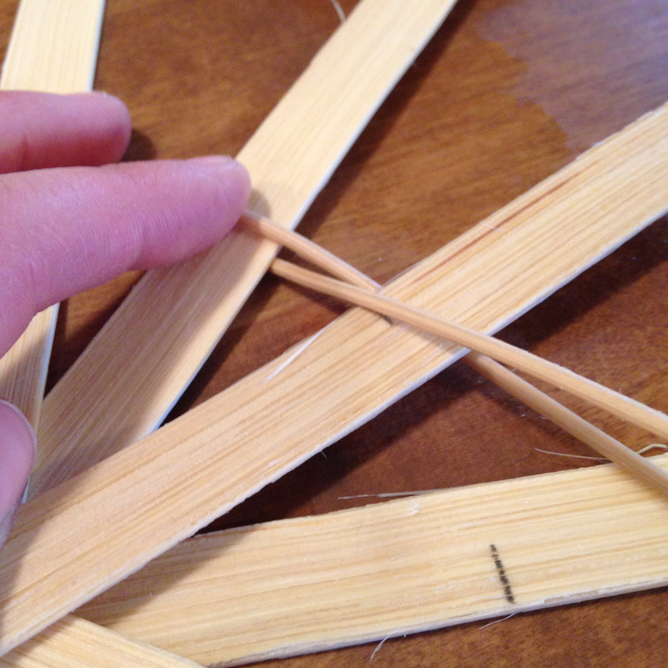
8. Once you do that, the twiner that was on the bottom now is on the top and becomes the one you twine behind the next stake.
It’s always the top twiner!
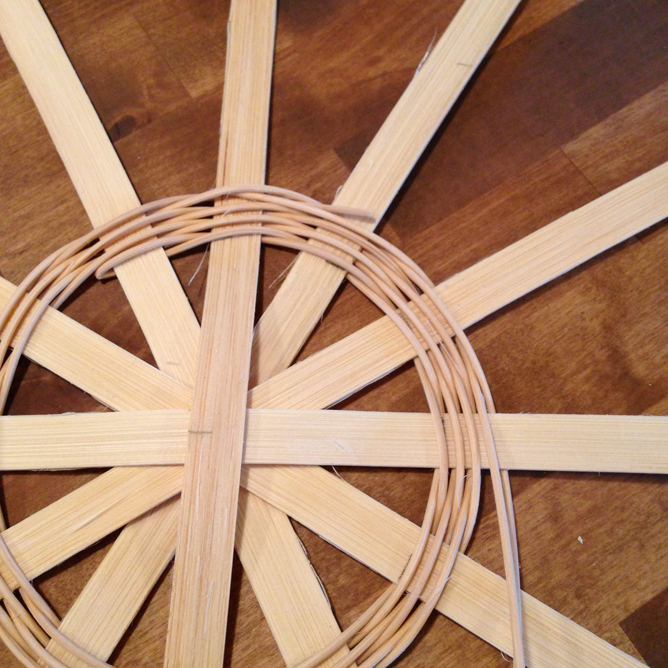
9. Keep twining around the circle until you reach the starting point. Now the stakes should be held in place by the #3, so you can adjust the circle to make it nice and round or straighten out the spaces between stakes that probably moved during the first round. Make sure the pizza slices created by the spokes are even!
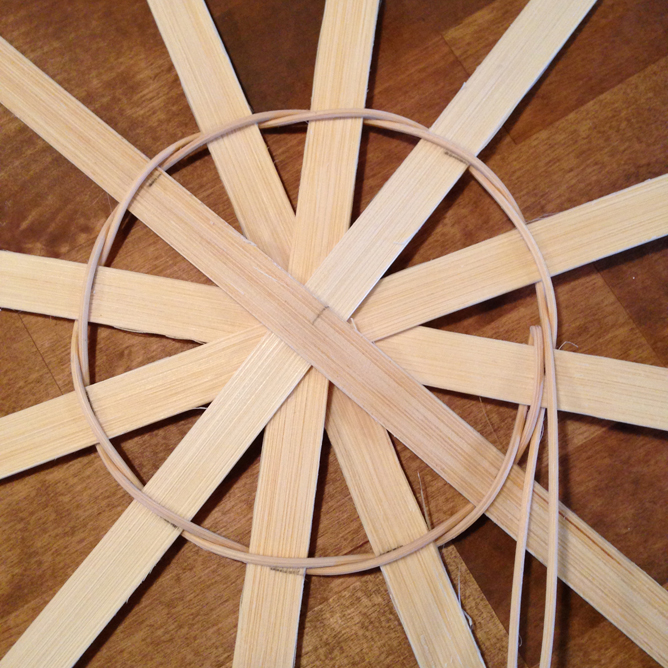
Helpful hint: Starting with a very round first row will make the entire shape of your basket more circular!
10. The next step is to keep on twining around the circle by taking the top twiner and weaving it behind the next stake. Check your pattern to see how many rows to twine before adding the next half of the stakes.
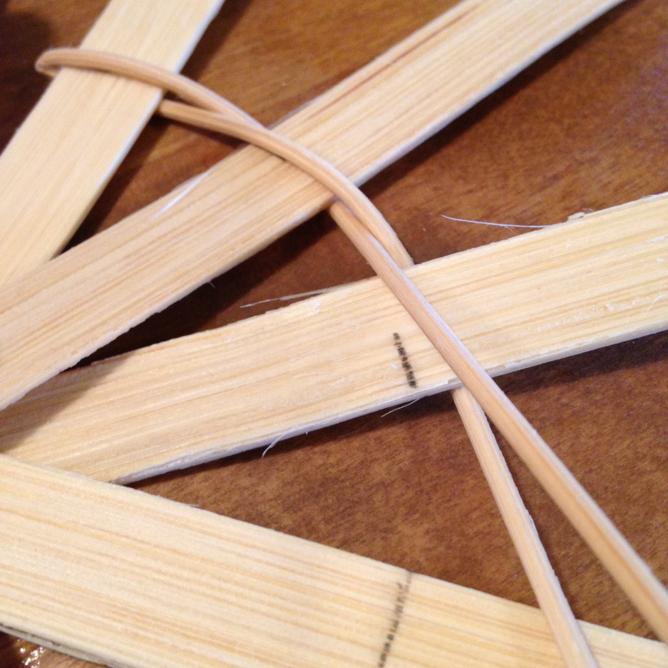
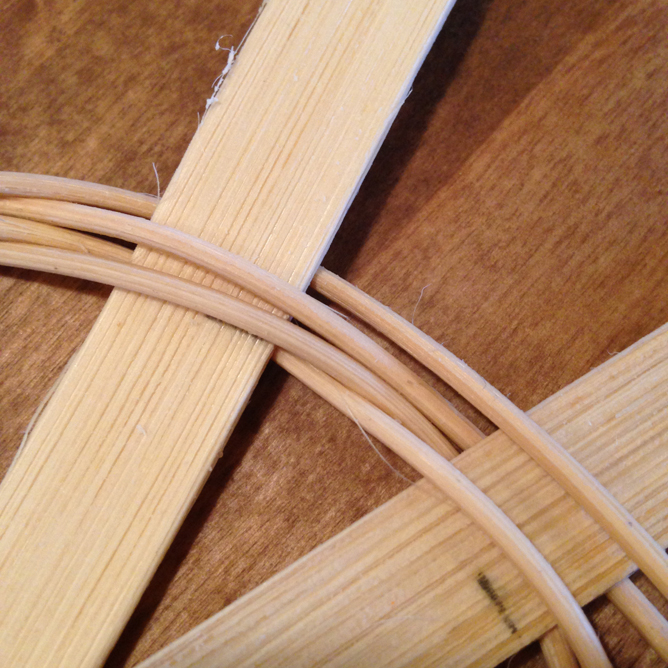
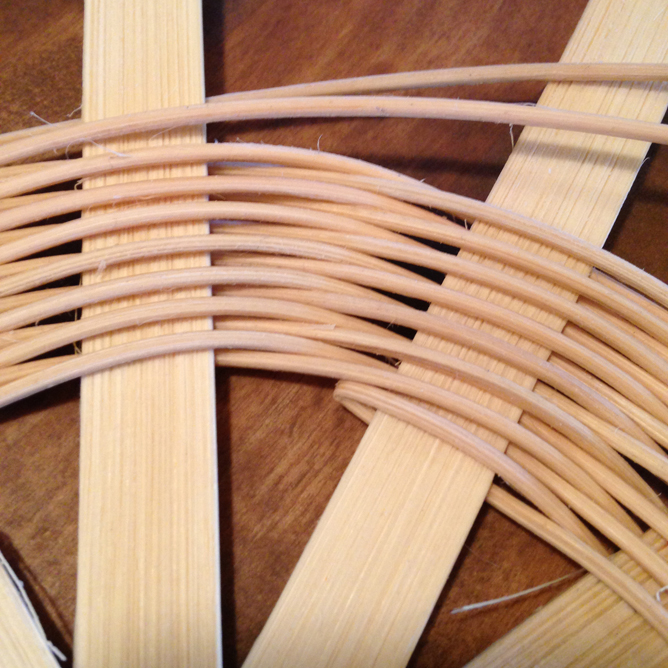
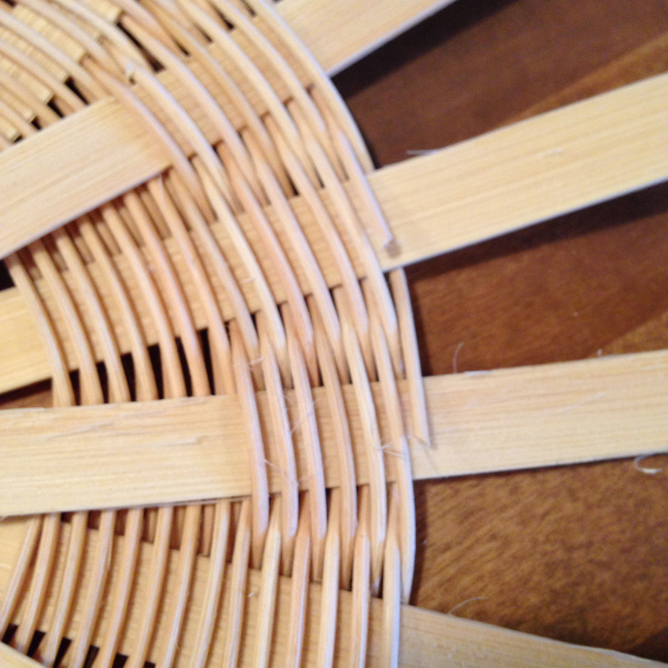
11. As you begin the second row of twining, you can tell if you’re doing it correctly if it looks like this:
This is what it looks like if the bottom twiner was used instead of the top twiner. This is what it SHOULDN’T look like:
Helpful hint: The longer twiner tails always get tangled as you weave. Occasionally untwist them by pulling one twiner through the knot it creates. Manually untwisting the twiners takes much longer!
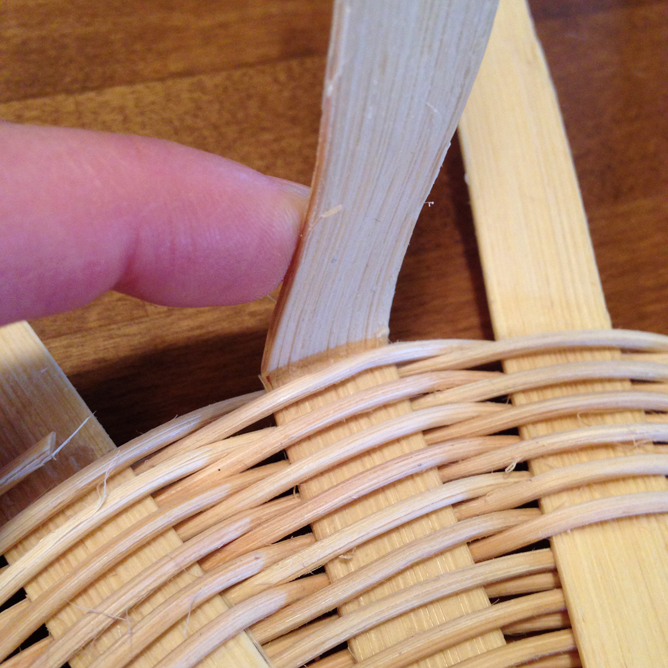
12. This pattern called for 8 rounds or rows before adding the next stakes. Chances are, your twiner will be too short to make it all the way to that measurement. If that happens, cut the short twiner so it rests on top of a stake.
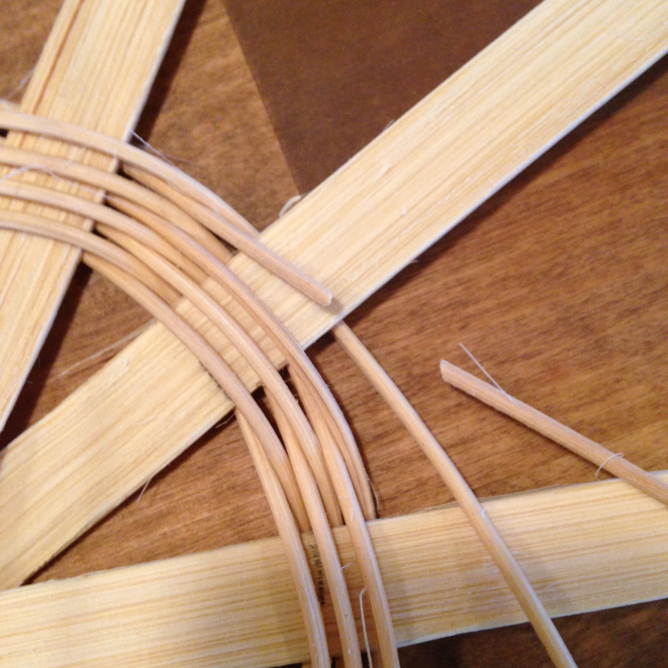
13. Place the tail of a new twiner one stake behind the cut twiner and tuck it underneath the other twiner.
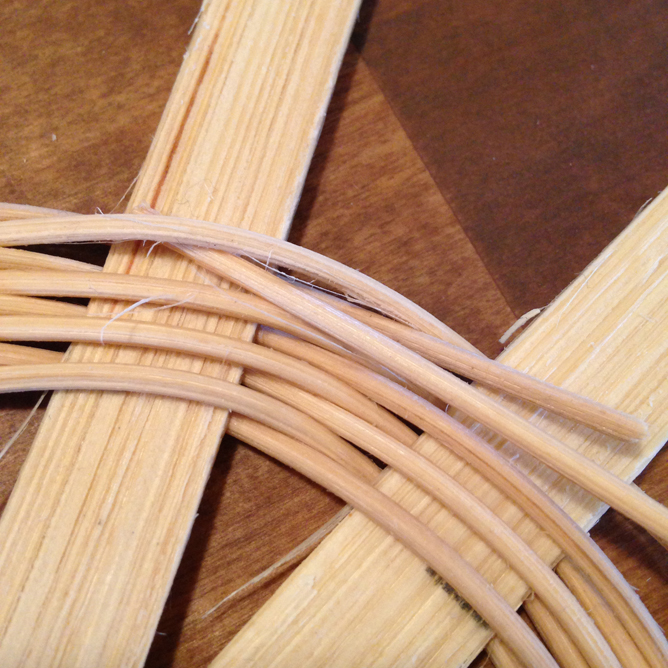
14. Continue twining with the new piece of #3 as if nothing had changed – top twiner behind the next stake.
Helpful hint: If your twiners both end at the same time, cut one back further to avoid overlapping the spliced twiners.
15. Count the number of rows when you return to the place where you started the twining.
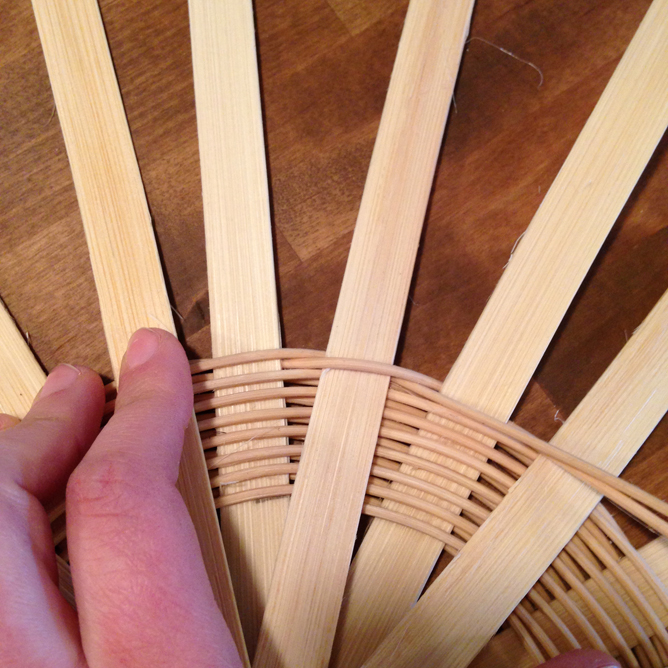
When you reach the required number of rows, it’s time to add the next batch of stakes. Overlap each stake on the center marks. Keep one hand planted firmly on the center to prevent the stakes from sliding all over.
16. Now begin twining again – top twiner behind next stake – but this time, include the newly added stakes as if they had always been there. Push the twiners down so the new stakes are tightly woven in.
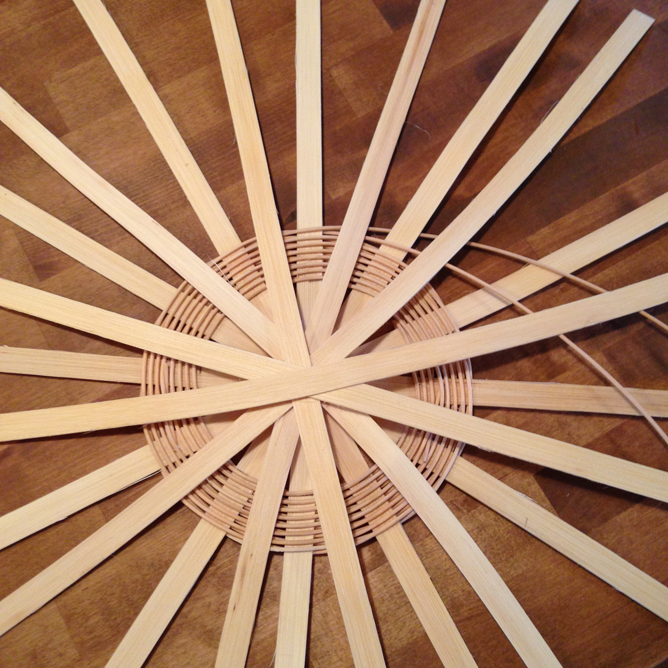
17. Continue twining all the way around the circle with the new stakes with your hand firmly planted on the center and then stop to straighten out the new stakes.

18. Now you’re on the home stretch until you reach the required measurement. If the #3 pieces end, go back to steps 12-14 and repeat the splicing process, but remember to try not to overlap splices on top of each other.
19. Once you’ve reached the correct diameter, end the #3 twiners by clipping them off on top of the stake where you begin the very first crimped twiner and the following stake.
20. Next, upset the stakes the same way you would on a rectangle base.
Congratulations on twining a round base! Check out this tutorial on weaving the sides for your next step.
Recent Comments
I can’t wait to try your method of splicing twiners. I’ve never been very happy with any way I’ve tried it. Thanks so much.
EXCELLENT BECAUSE IT ACTUALLY SHOWS HOW TO DO ANY SIZE ROUND BASKET!! GREAT HELP!! lOVE IT EVEN AFTER ALL THE YEARS I HAVE BEEN WEAVING BASKETS.
Are you suggesting a #3 twiner because that is what your pattern calls for,Joanna, or do you always twine any round basket with #3 for strength? Patterns I have used always called for #2.
We almost always use #3 round ... unless the basket base is very small. Then we use #2 round. On the other hand, if the basket base is quite large we will use #4 round.
Share This


Recent Entries
- Basket Finishes
- July ‘26 Free Pattern
- June ‘26 Free Pattern
- May ‘26 Pattern
- April ‘26 Pattern
- View Archive
Categories
Weaving Lessons
- Basket Finishes
- Staining Tutorial - With or Without Leather
- Weaving with a Wooden-Bottom Base Tutorial
- Wire and Bale Handles
- Weaving with Leather Handles
- Twining a Round Base Tutorial
- Leather Handled Tote Strapping Tutorial
- Singeing Tutorial
- Twining the Last Weaver Tutorial
- Sea Grass Continuous Weave Tutorial
- To stain or not to stain … that is the question!
- Shaping the Sides of a Basket Tutorial
- Double-Lashing Tutorial
- Clip and Tuck Tutorial
- Weaving the Sides Tutorial
The Basket Blog
Basket Finishes
July ‘26 Free Pattern
June ‘26 Free Pattern
Details & Such
Wholesale Inquiry?
If you are interested in wholesale pricing, please .(JavaScript must be enabled to view this email address) that has "wholesale inquiry" in the subject field.
Contact Information
.(JavaScript must be enabled to view this email address)
1422 Martha St N
Stillwater, MN 55082

Weaving Lessons
- Basket Finishes
- Staining Tutorial - With or Without Leather
- Weaving with a Wooden-Bottom Base Tutorial
- Wire and Bale Handles
- Weaving with Leather Handles
- Twining a Round Base Tutorial
- Leather Handled Tote Strapping Tutorial
- Singeing Tutorial
- Twining the Last Weaver Tutorial
- Sea Grass Continuous Weave Tutorial
- To stain or not to stain … that is the question!
- Shaping the Sides of a Basket Tutorial
- Double-Lashing Tutorial
- Clip and Tuck Tutorial
- Weaving the Sides Tutorial
Nice tutorial. When I weave a round basket, I use a T-pin to hold my spokes in place. I start the twining with #2 reed and use that until all the spokes are added ... then change to #3 round reed.
Linda Lou Alexander 04/10/15