Twining the Last Weaver Tutorial
On a basket, the last weaver is an important row. It’s the one sandwiched between the two rims. This is the row that will be held in place by the tucked stakes and the row that acts as the anchor for the rim and lasher. On many patterns (those with a rim filler), the last row is normally a final row of 3/8” woven into the side in the same way you wove the rest of the sides.
But in some patterns (those with an open or antique reproduction rim), the last weaver is twined from #3 round. Here’s how you can do that step.
Step 1: Soak the pieces of #3 round for several minutes until pliable. You don’t want these to be too crispy, or they’ll snap.
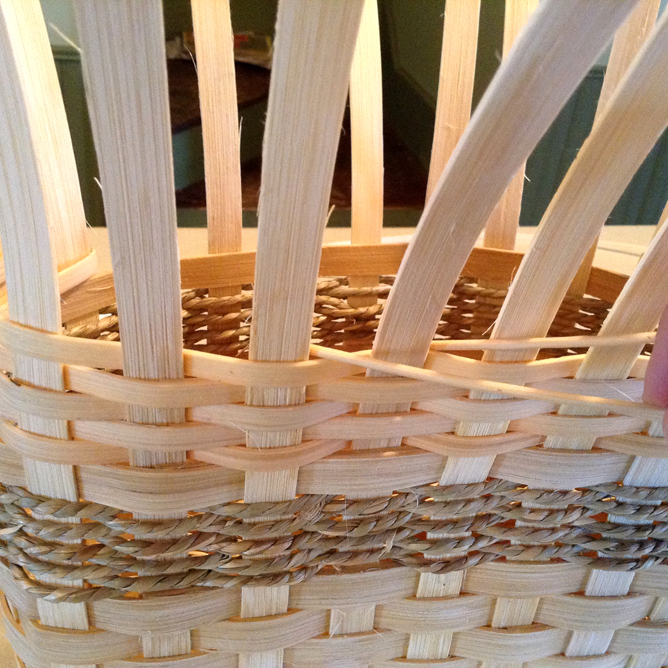
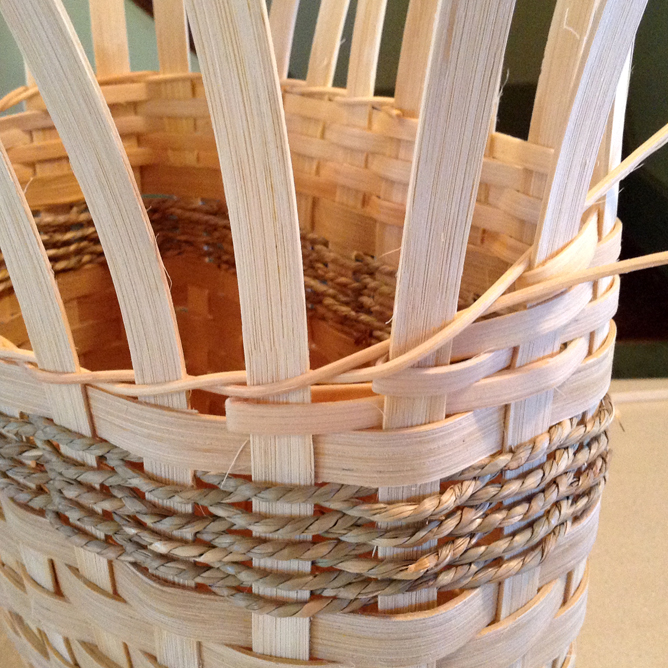
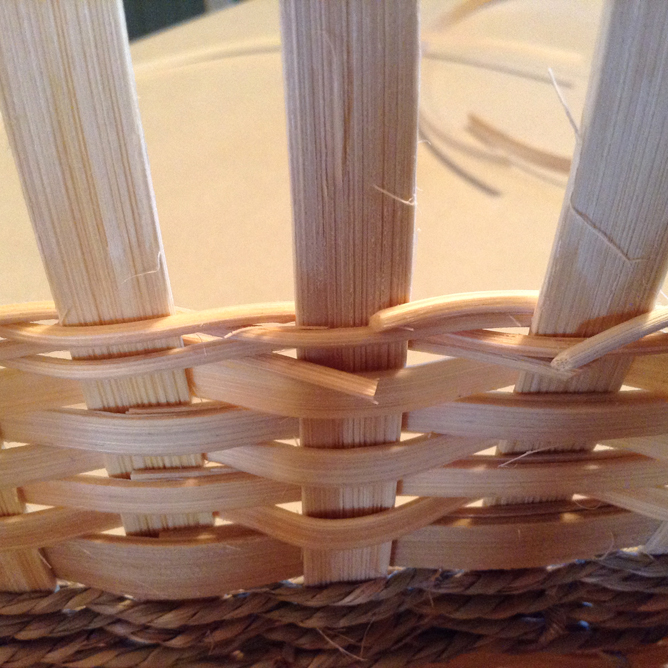
Step 2: Once the side weavers are all completed (but before you clip or tuck anything), begin by selecting one piece of #3 round and positioning the end behind a stake where the weaver is in front. You can start on either the front or back of the basket. Simply hold or clamp the #3 in place.
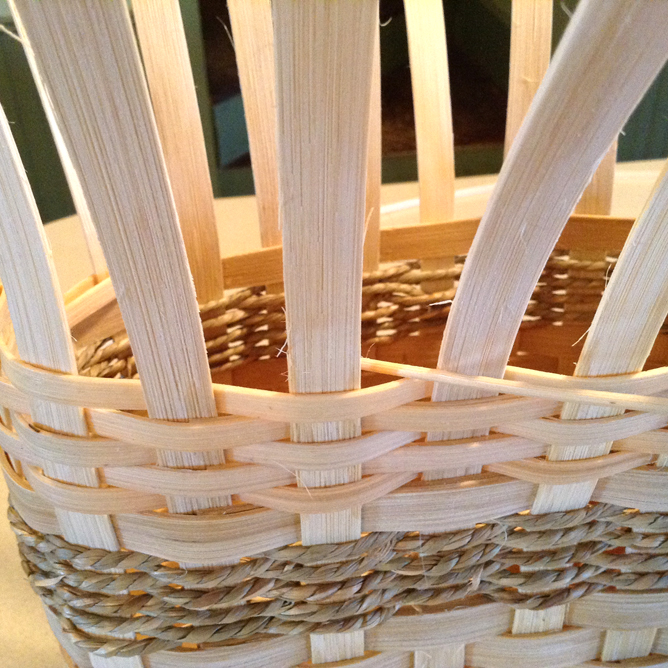
Step 2: Start the second piece of #3 round by placing the end of that piece behind the next stake to the right.
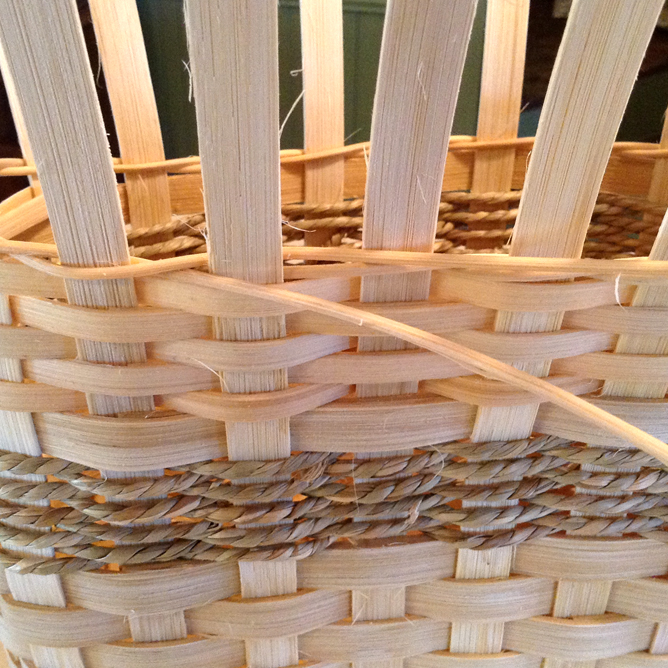
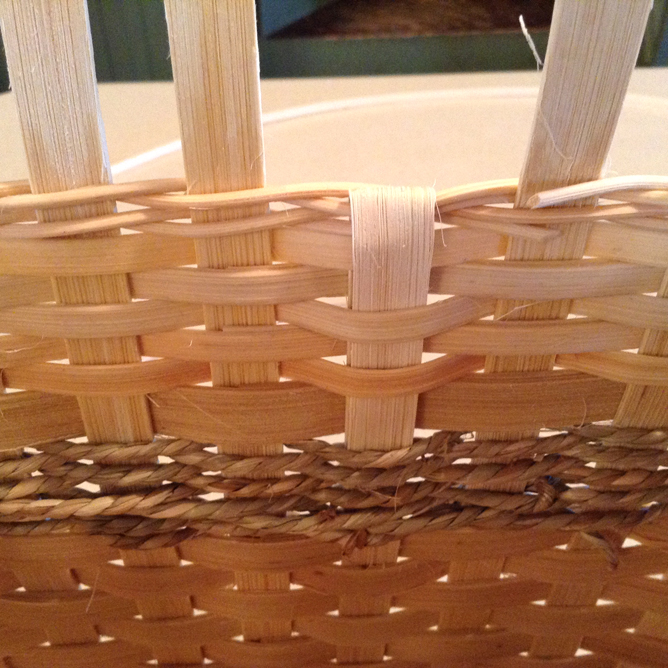
Step 3: Twining is a long game of leapfrog. Begin by twining the first piece of #3 round behind the third stake and out the hole.
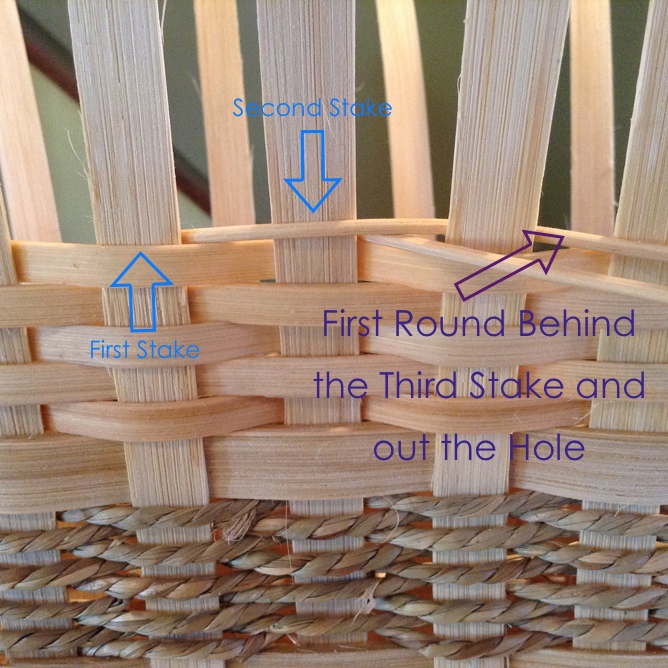
Then take the second piece, which is now the piece furthest to the left, and do the same thing – behind the fourth stake and out the hole.
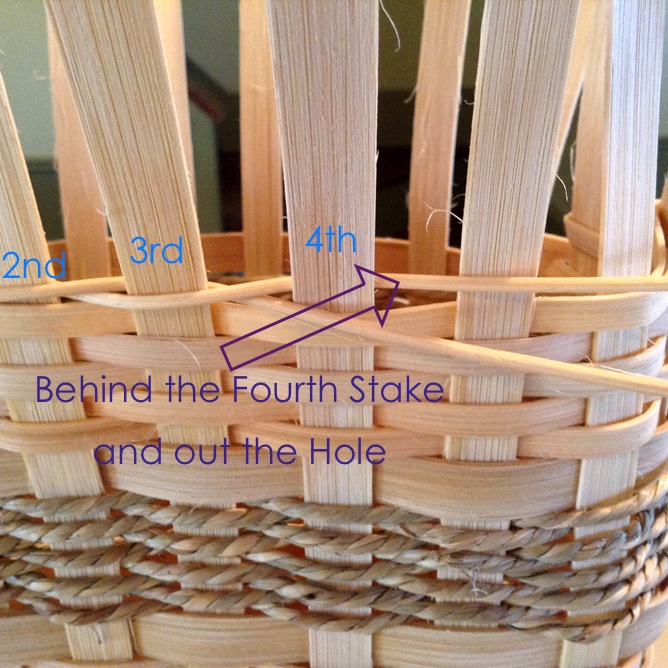
Leapfrog in this same pattern – twine the round furthest to the left behind the next stake and out the hole.
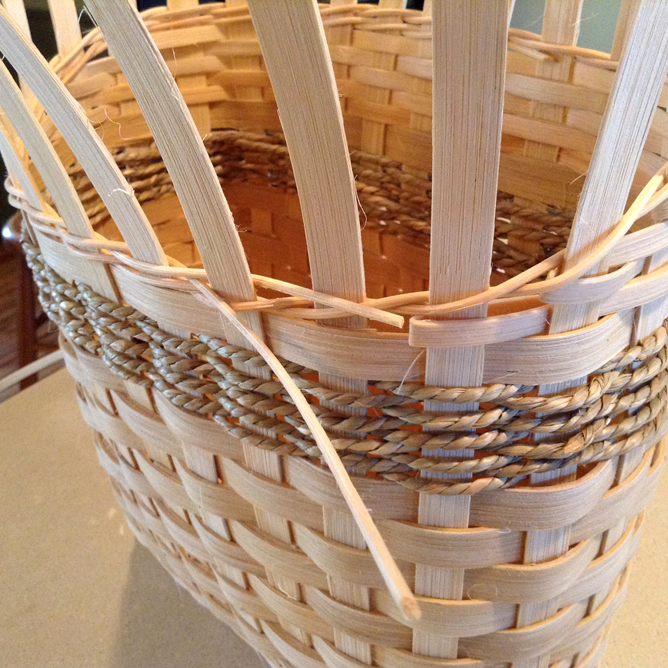
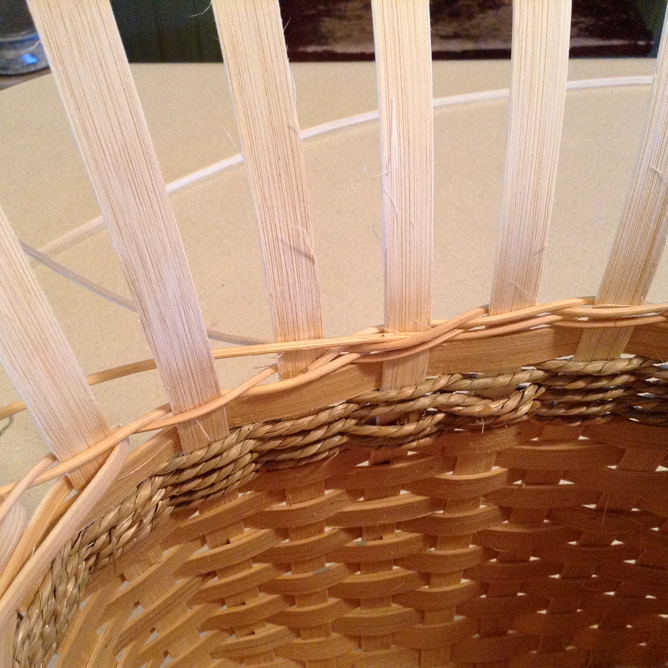
Step 4: Twining is usually used on patterns that include a stair-step weave. When you reach the stair step, simply follow the line the corners make with the twining.
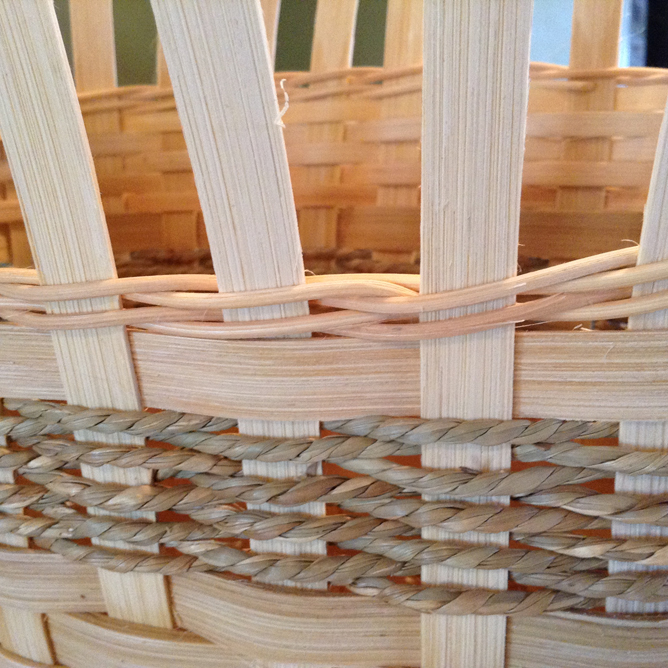
Step 5: When you reach the spot where you started the twining, resume leapfrogging over the first row and continue on to the second. This naturally should alternate to be the opposite of the first row.
Do this for as many rows the pattern calls for.
Step 6: Sometimes your #3 round either breaks or is too short. If that’s the case, you can fix it by clipping the round so it will hide behind a stake.
Then use a flat-tipped weaving tool to open a space to tuck the end into the row below.
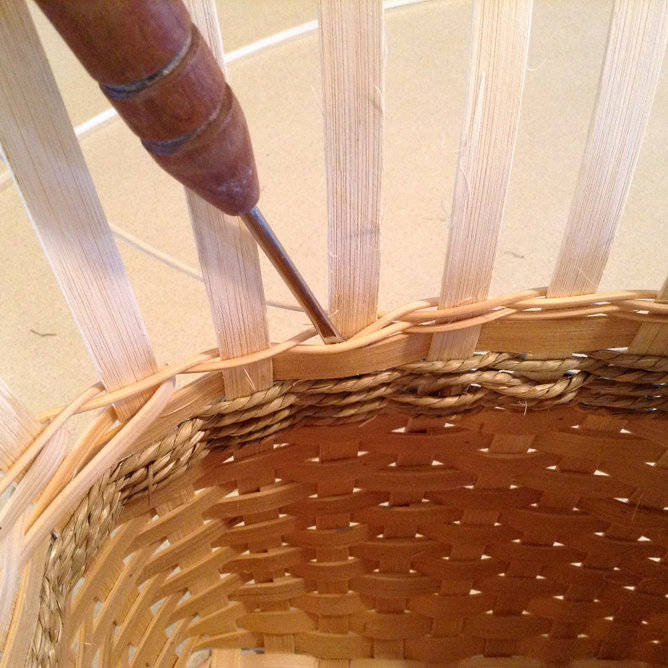
Take the end of a new piece of #3 round and tuck it into the row one stake back. Continue with the flow of the original piece and keep on twining.
Step 7: When you’ve twined the correct number of rows, clip the two pieces of round behind the same stakes where you started them.
You don’t need to tuck them into anything, because when you tuck the stakes, the start-stop of the round will be covered.
Remember that when you clip and tuck with a twined last row, you need to tuck every stake instead of clipping off every other stake.

Good job! You’re done!
Recent Comments
Thank you for sharing your expertise!
Share This


Recent Entries
- Basket Finishes
- July ‘26 Free Pattern
- June ‘26 Free Pattern
- May ‘26 Pattern
- April ‘26 Pattern
- View Archive
Categories
Weaving Lessons
- Basket Finishes
- Staining Tutorial - With or Without Leather
- Weaving with a Wooden-Bottom Base Tutorial
- Wire and Bale Handles
- Weaving with Leather Handles
- Twining a Round Base Tutorial
- Leather Handled Tote Strapping Tutorial
- Singeing Tutorial
- Twining the Last Weaver Tutorial
- Sea Grass Continuous Weave Tutorial
- To stain or not to stain … that is the question!
- Shaping the Sides of a Basket Tutorial
- Double-Lashing Tutorial
- Clip and Tuck Tutorial
- Weaving the Sides Tutorial
The Basket Blog
Basket Finishes
July ‘26 Free Pattern
June ‘26 Free Pattern
Details & Such
Wholesale Inquiry?
If you are interested in wholesale pricing, please .(JavaScript must be enabled to view this email address) that has "wholesale inquiry" in the subject field.
Contact Information
.(JavaScript must be enabled to view this email address)
1422 Martha St N
Stillwater, MN 55082

Weaving Lessons
- Basket Finishes
- Staining Tutorial - With or Without Leather
- Weaving with a Wooden-Bottom Base Tutorial
- Wire and Bale Handles
- Weaving with Leather Handles
- Twining a Round Base Tutorial
- Leather Handled Tote Strapping Tutorial
- Singeing Tutorial
- Twining the Last Weaver Tutorial
- Sea Grass Continuous Weave Tutorial
- To stain or not to stain … that is the question!
- Shaping the Sides of a Basket Tutorial
- Double-Lashing Tutorial
- Clip and Tuck Tutorial
- Weaving the Sides Tutorial
I like the idea of tucking every spoke for larger baskets. It will make for a nice strong rim. Can you sandwich the round reed between 5/8” flat oval reed? If so, what number seagrass would you use to hide the “guts” of the rim? I love all of your baskets and I love how you share your tips and tricks.
Elaine Keefer 03/23/14