Weaving the Sides Tutorial
Now that you’ve upsett the stakes of the basket, the base is completely finished! The next stage of weaving takes the flat base and transitions it to the upright sides of the basket.

Step 1: Soak the weavers in warm water for several minutes until they are pliable. Find the rough side of a weaver by folding it slightly to see which side has splinters that pop up.
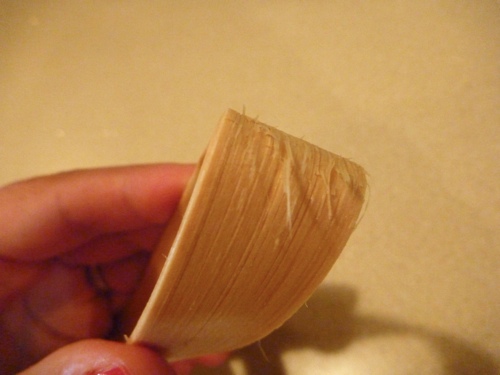
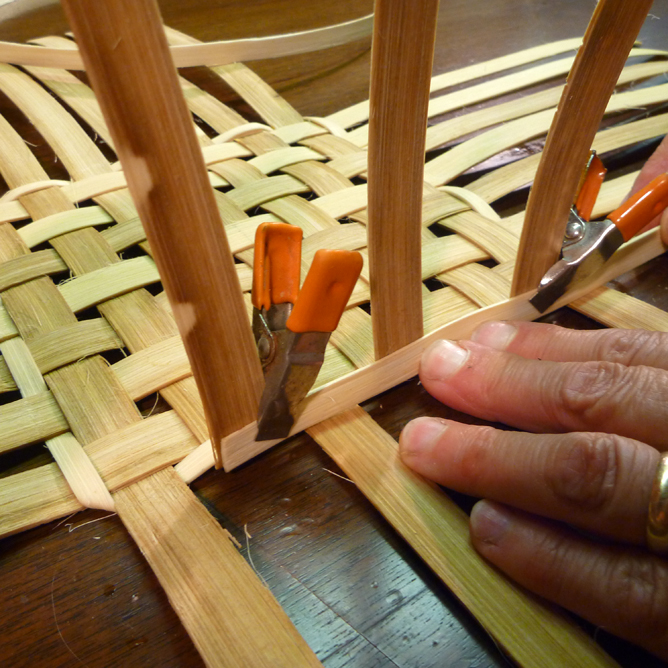
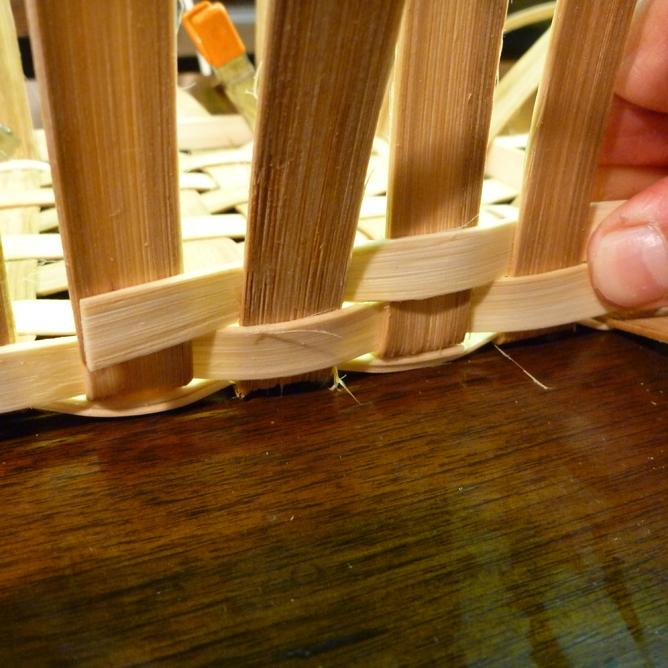
Step 2: With the rough side facing the inside of the basket, place the end of one weaver on the outside of a stake that is…
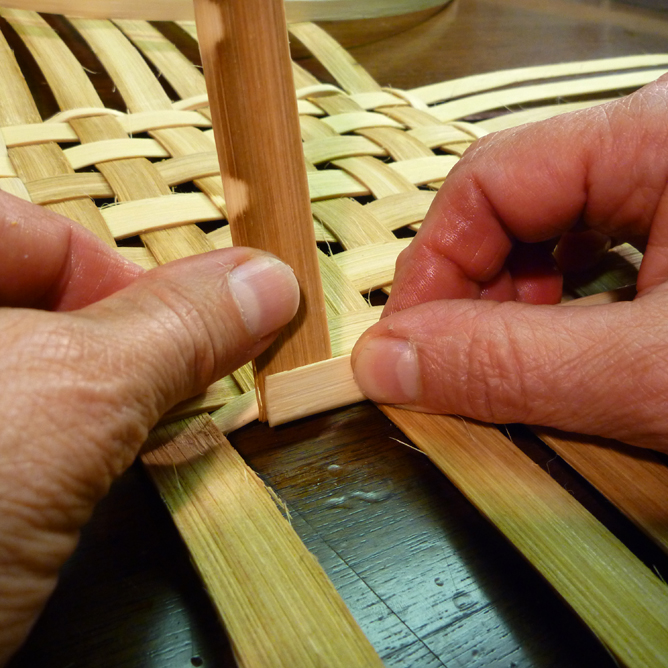
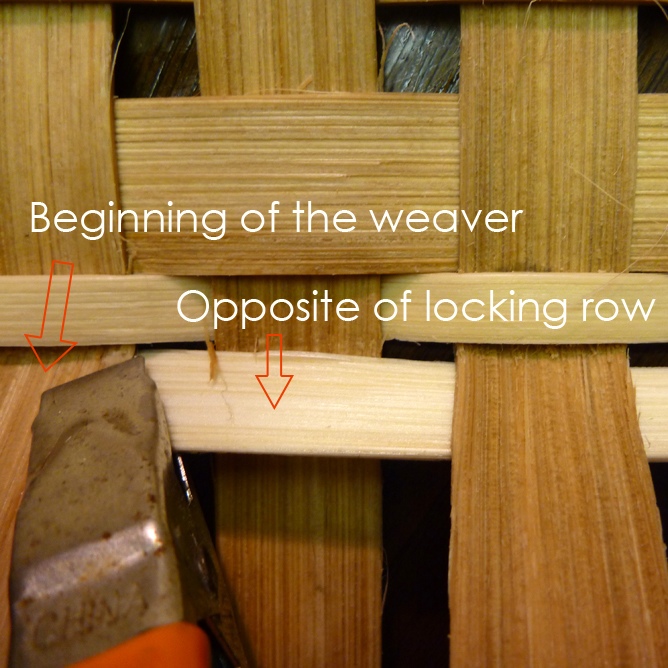
1) opposite of the locking row
and 2) at least four stakes away from the right corner of the basket. Your long weaver tail will be working toward the right of the basket. Clamp it in place with a hippo clip or strong clothespin.
Step 3: Weave the reed in and out of the stakes, remembering to continue opposite of the locking row. When you come to a corner, clamp the weaver in place and continue alternating in and out of the stakes.
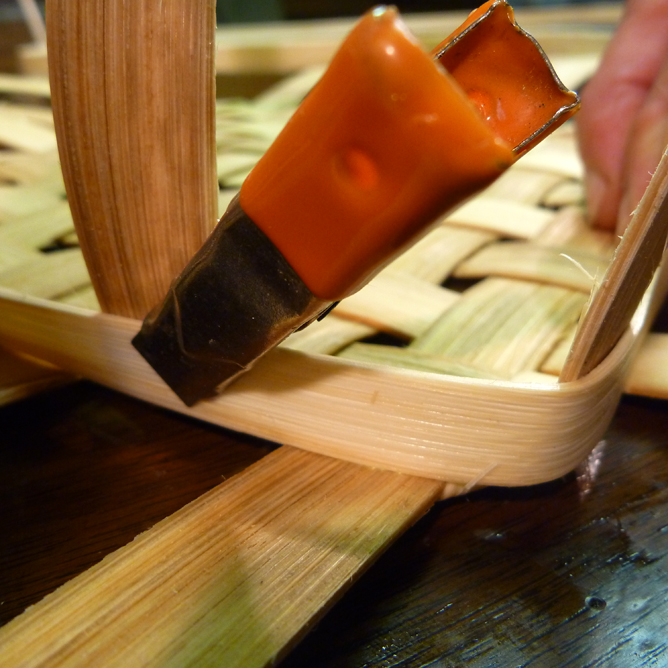
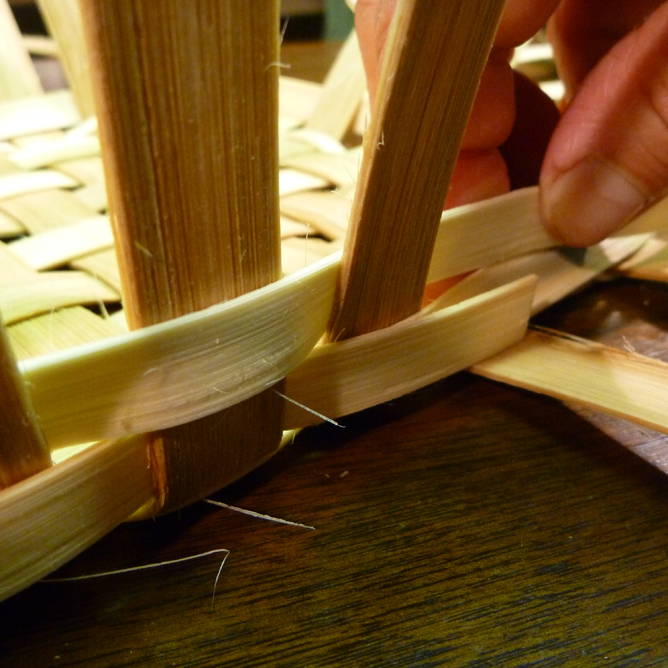
Continue around the base until you reach the beginning of the weaver.
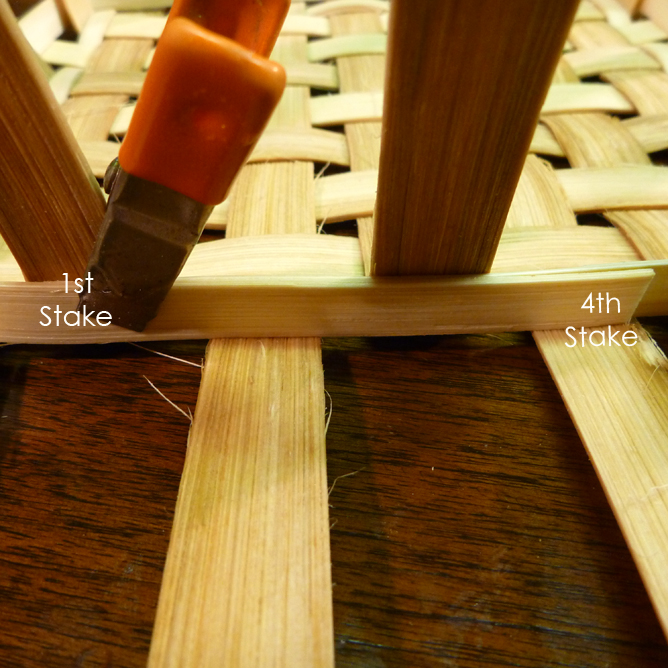
Step 4: Overlap the beginning of the weaver with the tail of the weaver by four stakes. Clip the tail of the weaver so that it fits behind the fourth stake from the start. That overlap will be hidden once the stakes are standing upright. You won’t be able to see where the weaver started or where it ended.
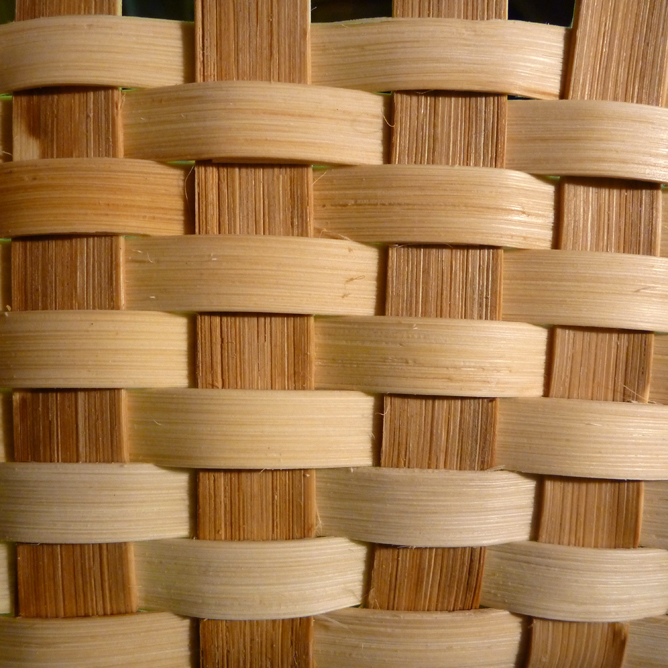
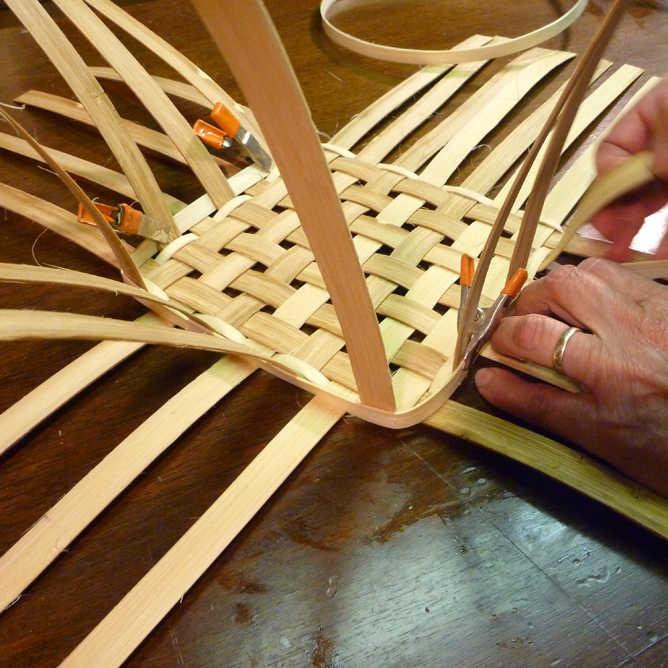
Step 5: Turn to the opposite side of the basket and repeat steps 2-4 to weave in the second row, third row, etc.. Pack each row down tightly as you proceed up the sides of the basket.
When you return to the place where you overlapped the previous row, continue weaving right over. This will pull the stakes into place and hide the overlap.
Remember to begin each row on alternating sides of the basket. Once the sides become more firm, you can weave with the basket on its side rather than resting flat on the base. Weaving with the basket on its side makes it easier!
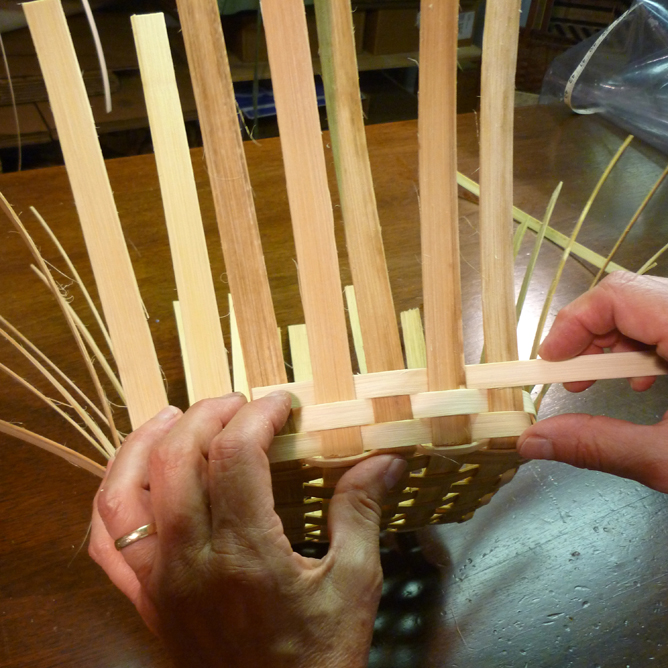
Helpful Hint: In between rows, be sure to pack the rows down tightly. When the reed dries, it shrinks a little bit, so making sure the weavers are packed down will prevent spaces from forming in between rows.

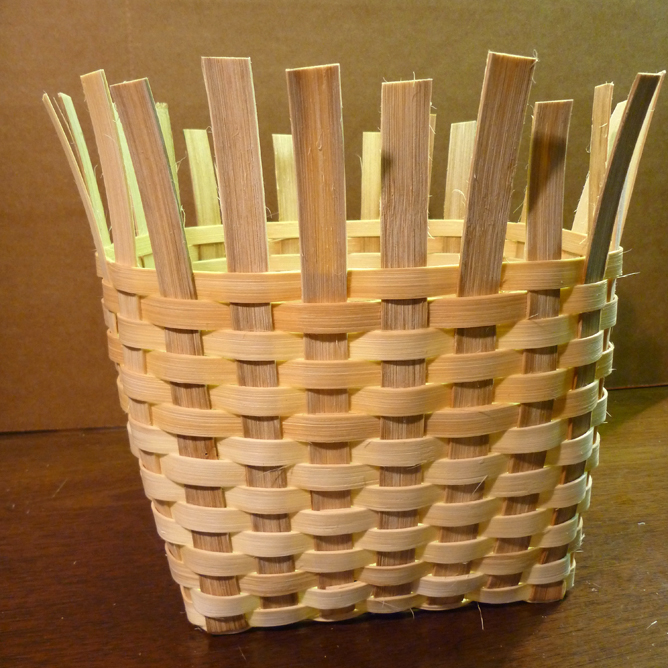
Weave as many rows as the pattern calls for. The next step is clipping and tucking - tutorial coming soon!
Recent Comments
Share This


Recent Entries
- Basket Finishes
- July ‘26 Free Pattern
- June ‘26 Free Pattern
- May ‘26 Pattern
- April ‘26 Pattern
- View Archive
Categories
Weaving Lessons
- Basket Finishes
- Staining Tutorial - With or Without Leather
- Weaving with a Wooden-Bottom Base Tutorial
- Wire and Bale Handles
- Weaving with Leather Handles
- Twining a Round Base Tutorial
- Leather Handled Tote Strapping Tutorial
- Singeing Tutorial
- Twining the Last Weaver Tutorial
- Sea Grass Continuous Weave Tutorial
- To stain or not to stain … that is the question!
- Shaping the Sides of a Basket Tutorial
- Double-Lashing Tutorial
- Clip and Tuck Tutorial
- Weaving the Sides Tutorial
The Basket Blog
Basket Finishes
July ‘26 Free Pattern
June ‘26 Free Pattern
Details & Such
Wholesale Inquiry?
If you are interested in wholesale pricing, please .(JavaScript must be enabled to view this email address) that has "wholesale inquiry" in the subject field.
Contact Information
.(JavaScript must be enabled to view this email address)
1422 Martha St N
Stillwater, MN 55082

Weaving Lessons
- Basket Finishes
- Staining Tutorial - With or Without Leather
- Weaving with a Wooden-Bottom Base Tutorial
- Wire and Bale Handles
- Weaving with Leather Handles
- Twining a Round Base Tutorial
- Leather Handled Tote Strapping Tutorial
- Singeing Tutorial
- Twining the Last Weaver Tutorial
- Sea Grass Continuous Weave Tutorial
- To stain or not to stain … that is the question!
- Shaping the Sides of a Basket Tutorial
- Double-Lashing Tutorial
- Clip and Tuck Tutorial
- Weaving the Sides Tutorial
There are no comments yet... You could be the first!