Double-Lashing Tutorial
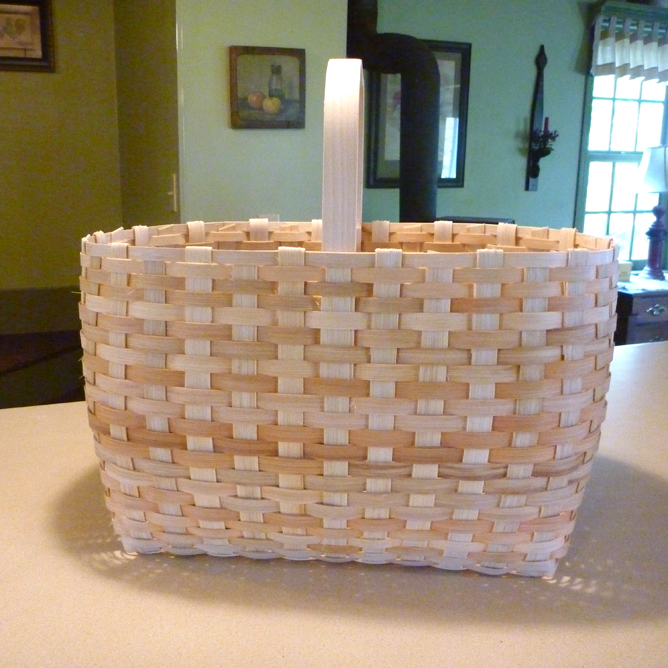
Once you have finished weaving the sides of your basket, you are ready for the final step – rimming and lashing!
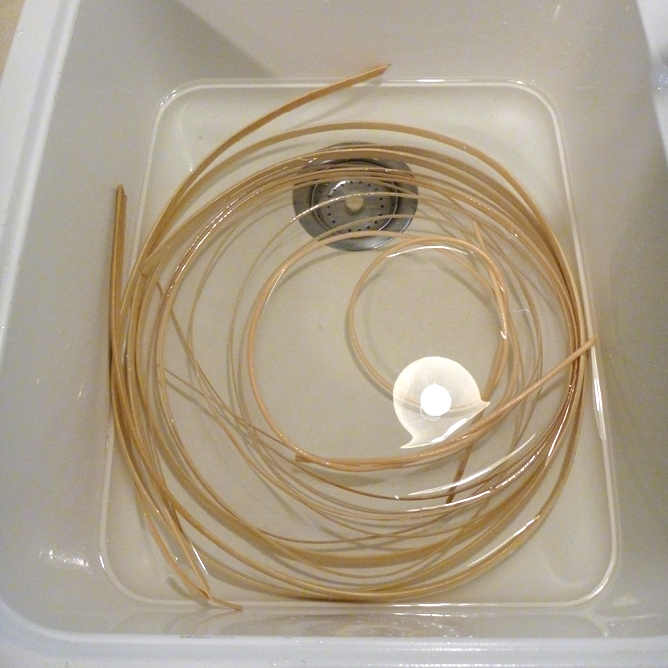
Be sure to soak the inside and outside rim pieces, the rim filler piece (if using round reed), and the lashing piece(s), in warm water for several minutes until they are pliable.
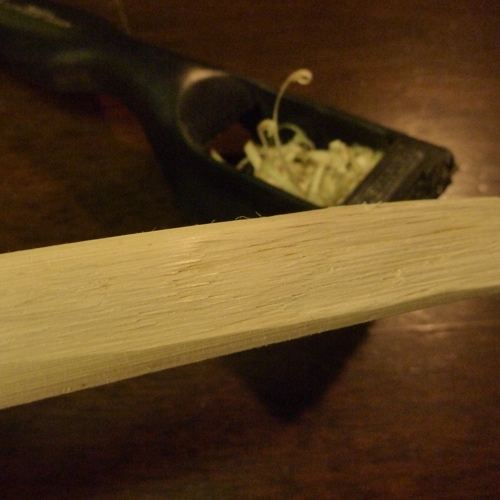
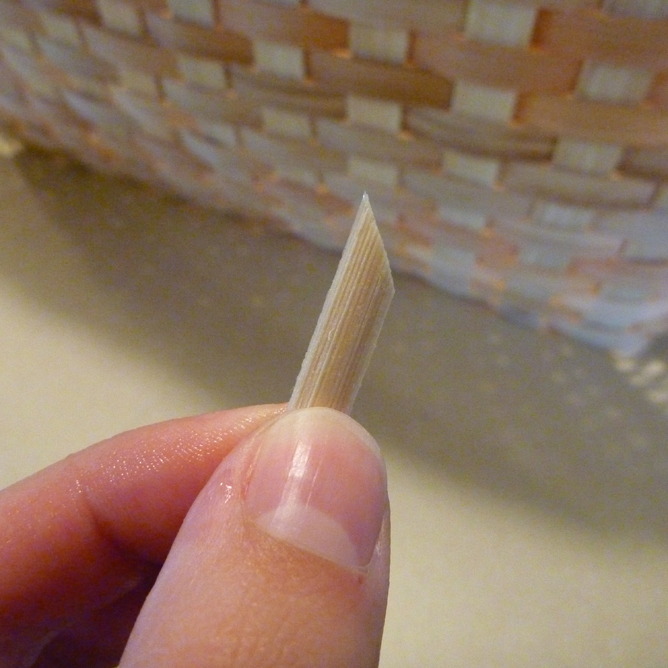
Step 1: The rim consists of two pieces of flat oval reed (either 1/2” or 5/8“ wide). Start by tapering one end of each of the two rim pieces with a Stanley Surform® Shaver or utility knife. Shave 2”-3” because this is where the rim will overlap itself.
Step 2: Begin by placing the shaved end of the inside rim flat side against the stake just left of the center stake on the side without the handle. Or if the basket doesn’t use a handle, place the inside rim on the front side. This will hide the overlap from view once the basket is completed.
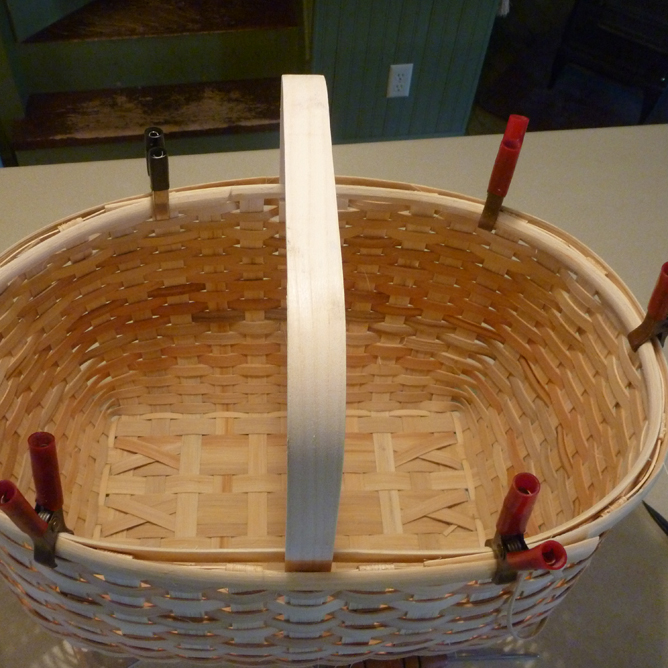
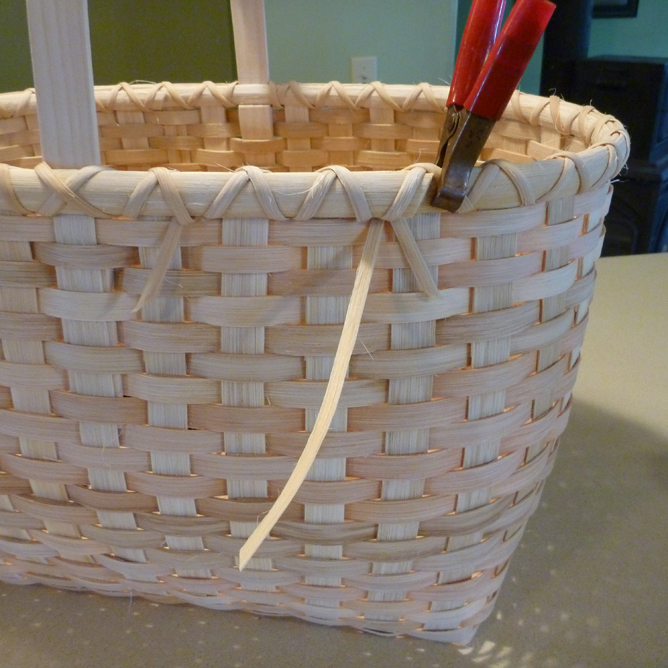
Step 3: Use clothespins or hippo clips to clamp the rim to the last row of 3/8” flat reed weaving and work your way around the inside of the basket in a clockwise direction, pinning as often as necessary to smooth out any bubbles or puckers in the rim. The inside rim must fit very snugly.
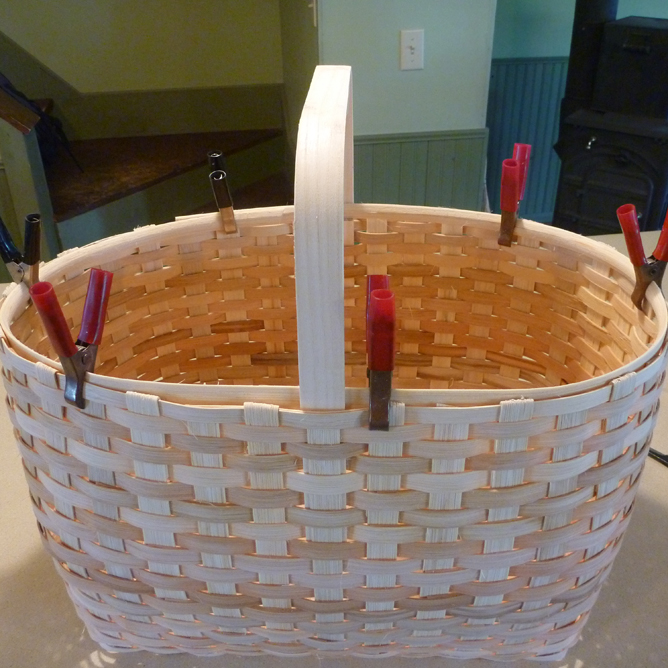
Step 4: The tail end of the inside rim will overlap the beginning of the piece by 2”-3”. Cut any excess off the end with a diagonal cut.
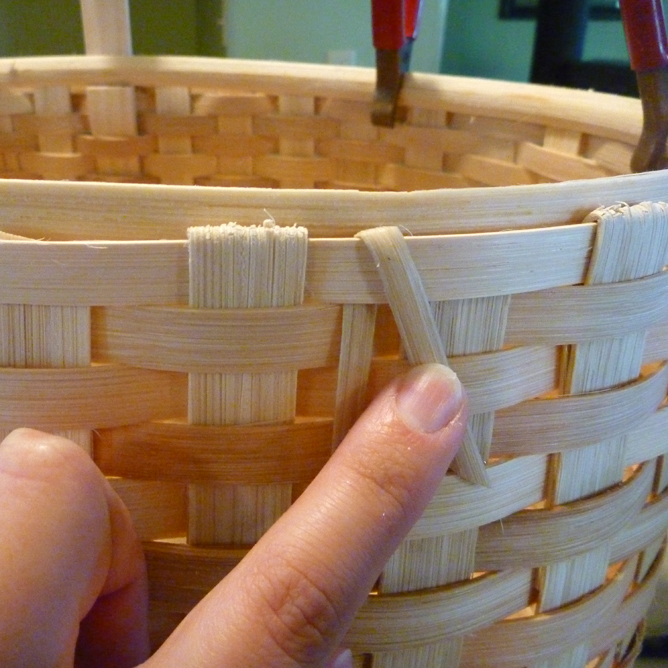
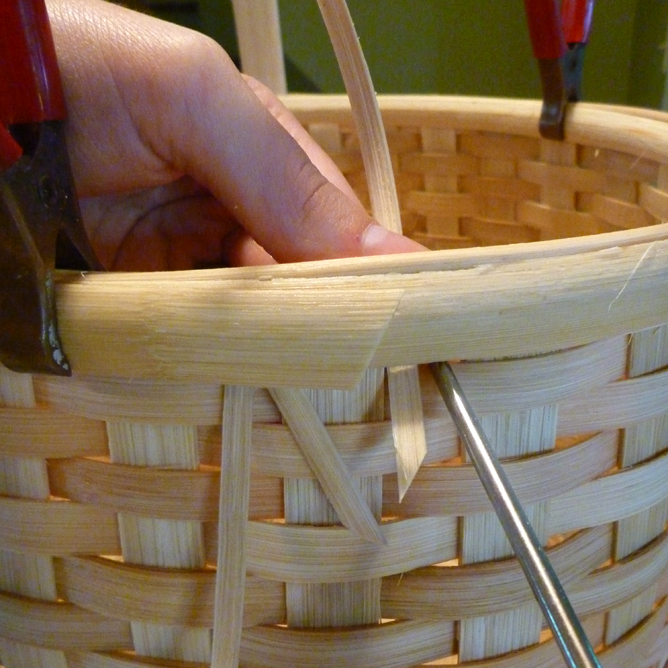
Step 5: Now you will work on the outside of the basket. The outside rim starts and overlaps on the opposite side of the basket as does the inside rim. Turn the basket around and locate the center three stakes (if the basket doesn’t have a handle) or on the opposite diagonal of the start of the inside rim (if the basket has a handle). Before you clamp the outside rim in place, get the lasher (either 11/64” or 3/16” flat oval reed) into position. Begin by cutting the end of the lasher into a diagonal so it’s easier to insert between stakes.
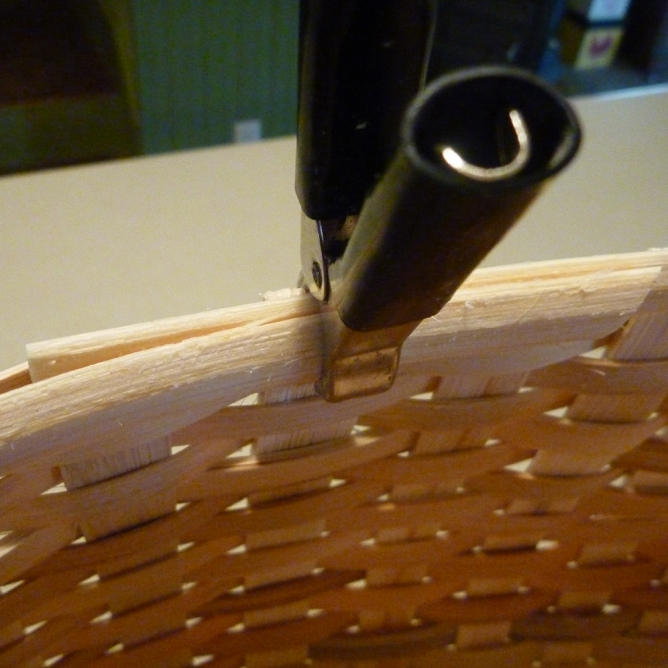
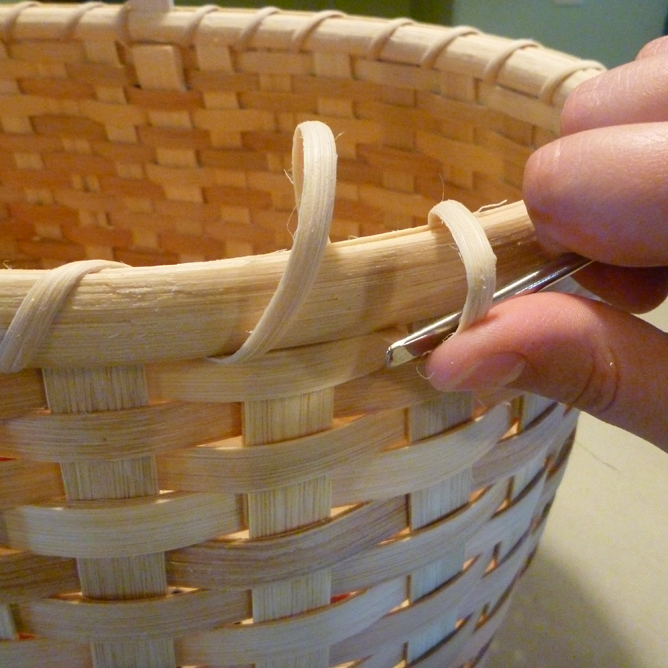
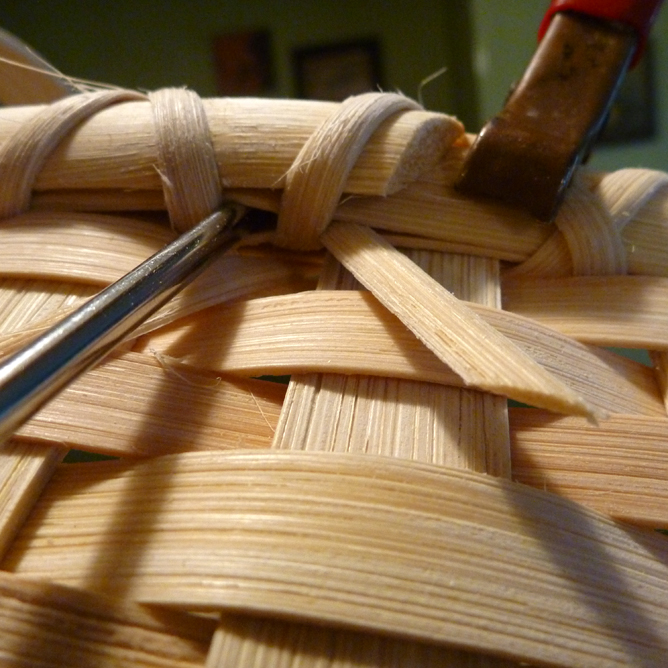
Use a flat-tip basket tool to open up a space under the last row of 3/8” flat reed and between the center stake and the stake to the right of it.
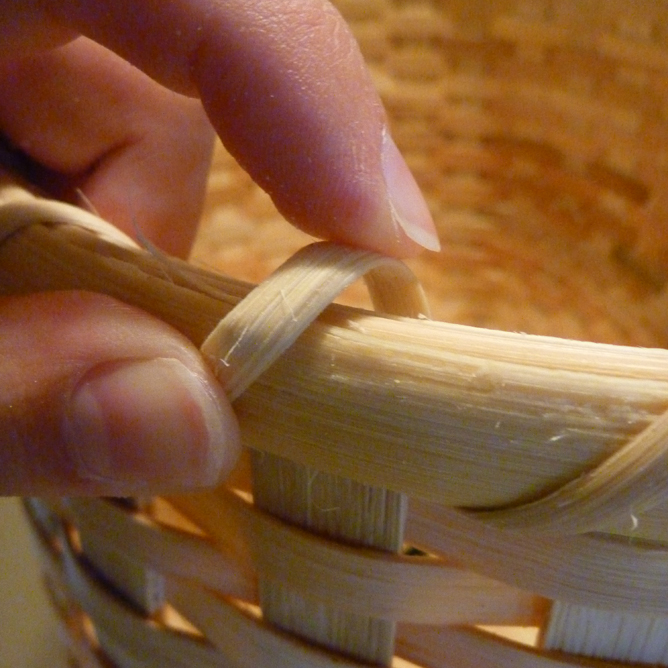
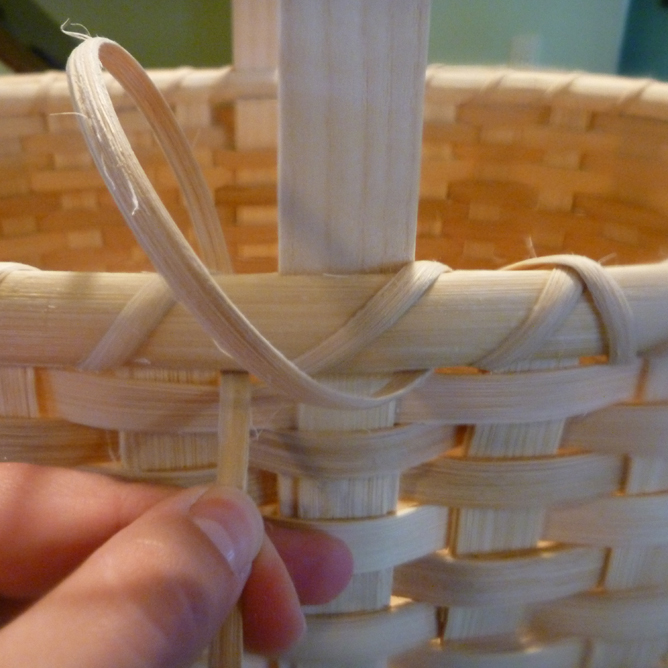
Step 6: Slide the end of the lasher (with the oval side against the basket) behind the last row of 3/8” flat reed. Fold the end of the lasher up and over with a 2” tail. This “fishhook” secures the beginning of the lasher. Clamp that in place.
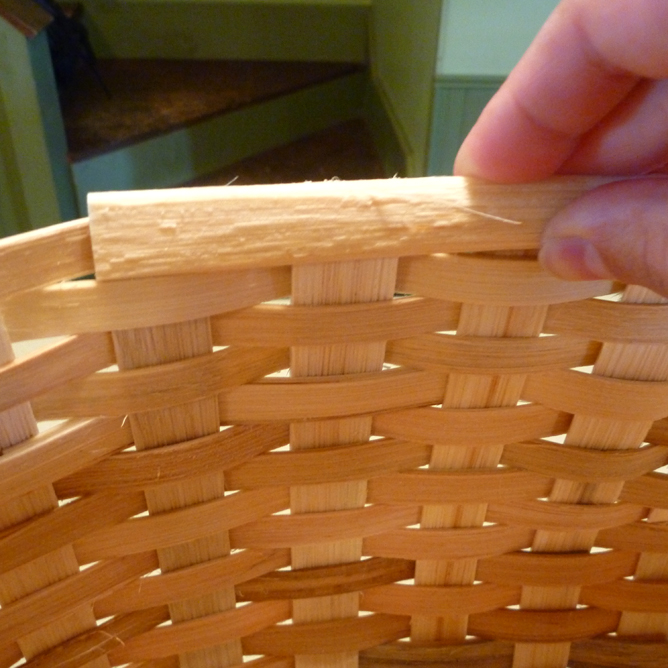
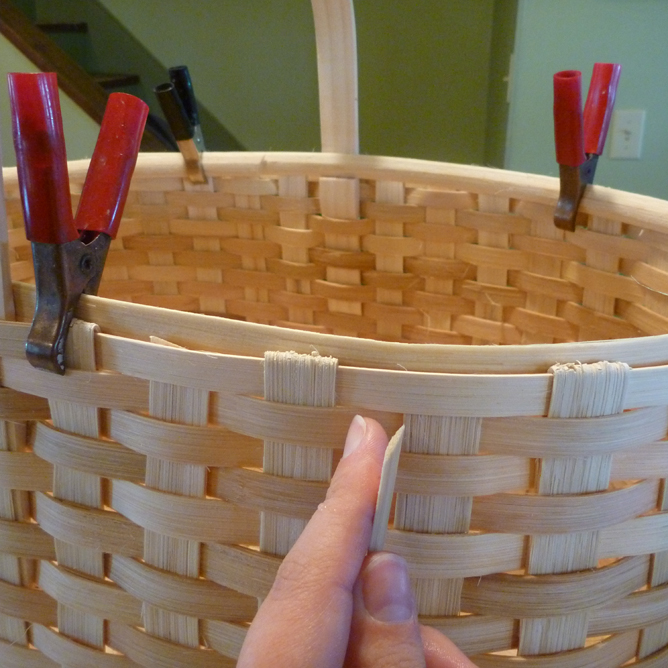
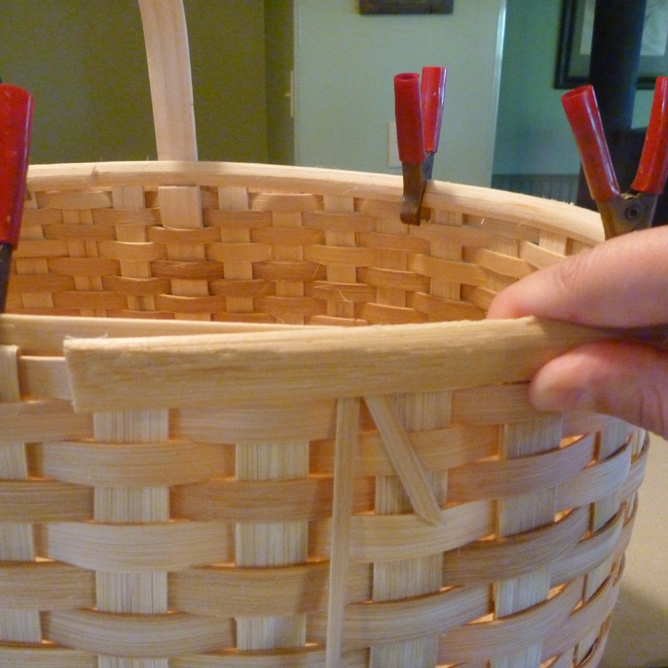
Step 7: Place the shaved end of the outside rim on top of the stake just to the left of the center stake. The outside rim will sandwich the last row of 3/8” flat reed, rim filler and lasher tail with the inside rim.
Step 8: The rim filler is usually a piece of #6 round reed or #3 sea grass. On a basket with a handle, the rim filler is cut with a straight edge that butts up against either side of the handle. Clamp the filler in place on both sides of the handle.
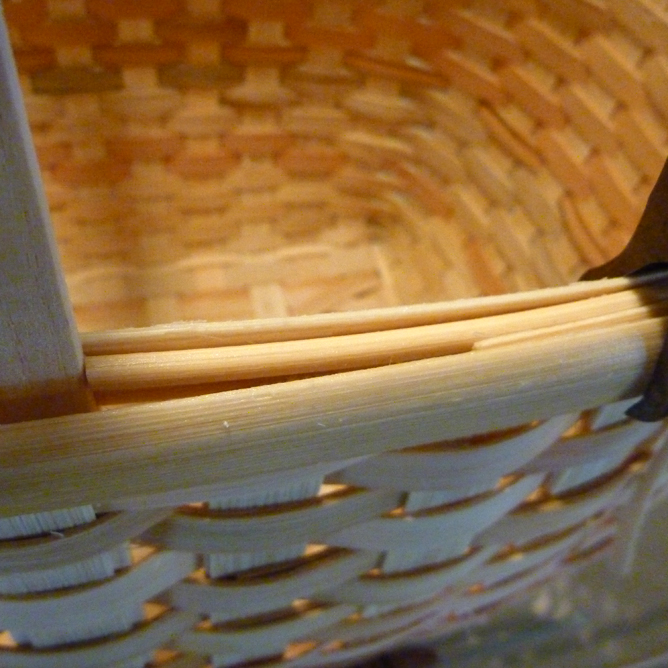
Helpful Hint: If your basket does not have a handle, cut the rim filler at a diagonal and line up the cut end over a clipped stake. Don’t cut the other end to match until you’ve lashed the basket, because the rim filler may move around a bit as the rim is tightened.
Step 9: The outside rim is clamped in a counterclockwise direction to prevent the rim from puckering as it is lashed later. Use the same clothespins to clamp the inside rim and outside rim together, sandwiching the rim filler in between.
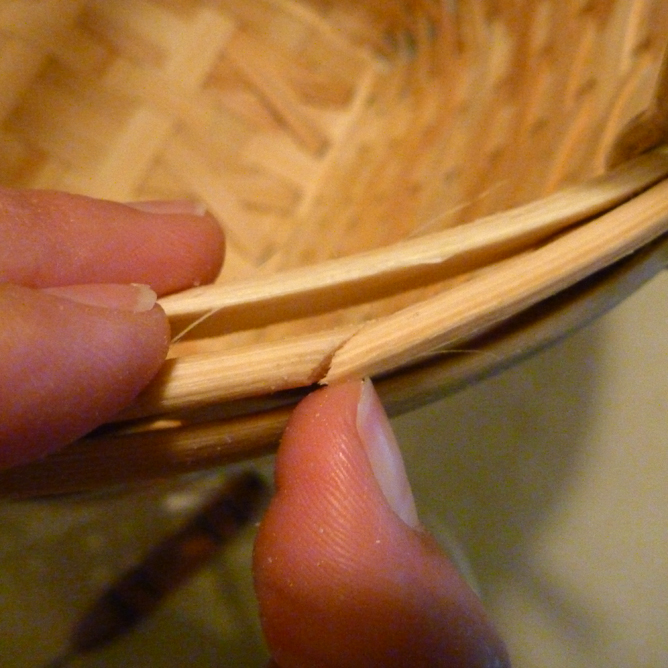
Overlap the beginning of the outside rim by 2”-3” and cut any excess off the end with a diagonal cut.
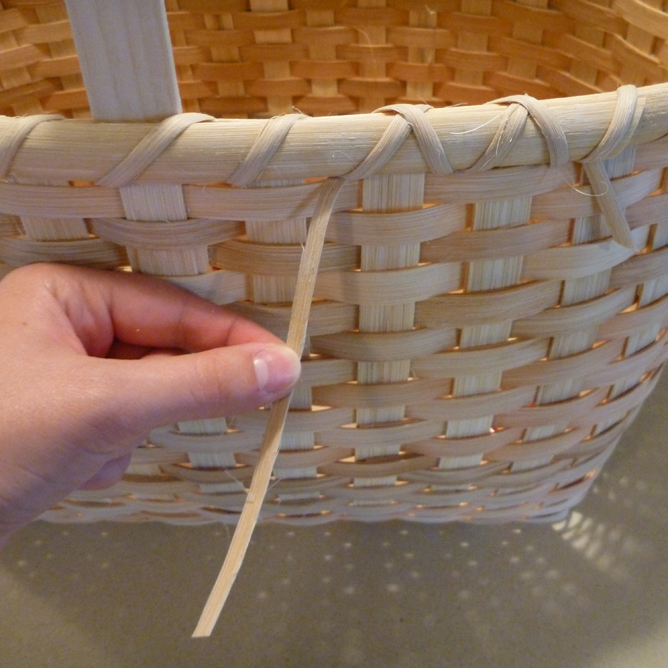
Step 10: Return to the lasher that is attached at the overlap of the outside rim. It is important to unwind the entire length of the lasher so there aren’t any twists in the lasher. (If there are twists remaining when you loop the lasher around the rim, the lasher won’t sit flat on the rim nor will it fit through the small spaces it needs to.) If desired, you can cut another diagonal on the unattached end of the lasher to make it easier to insert through the spaces.
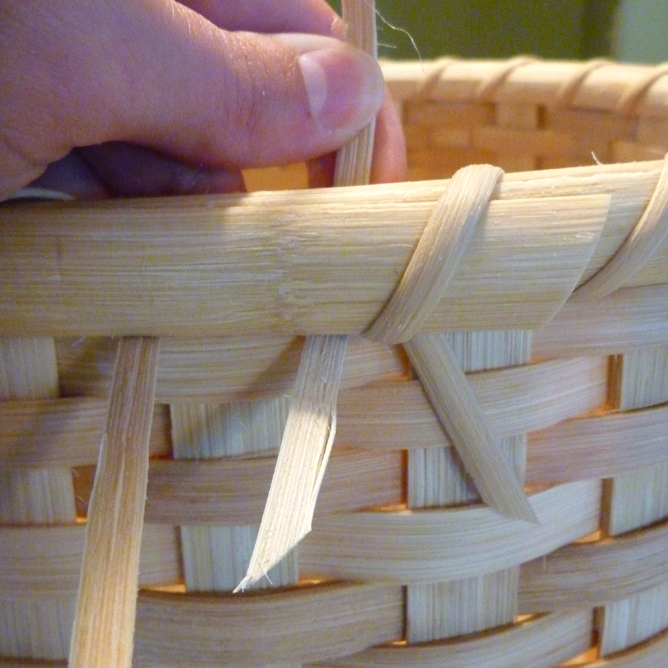
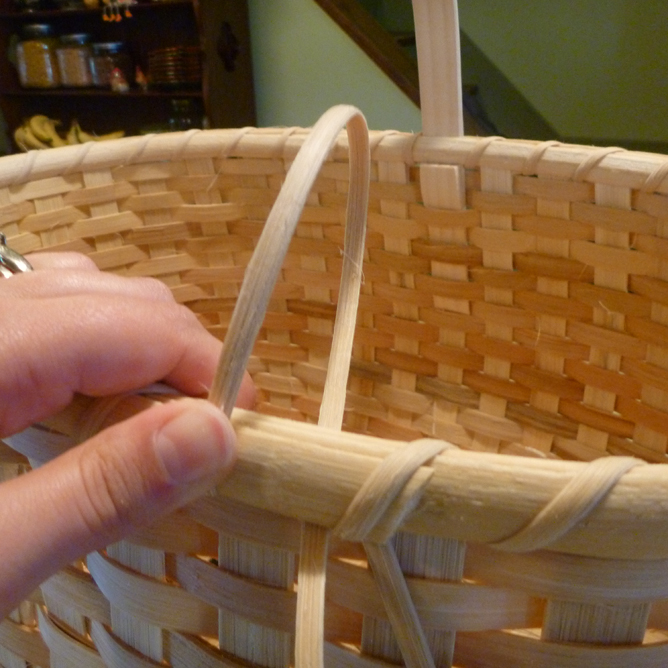
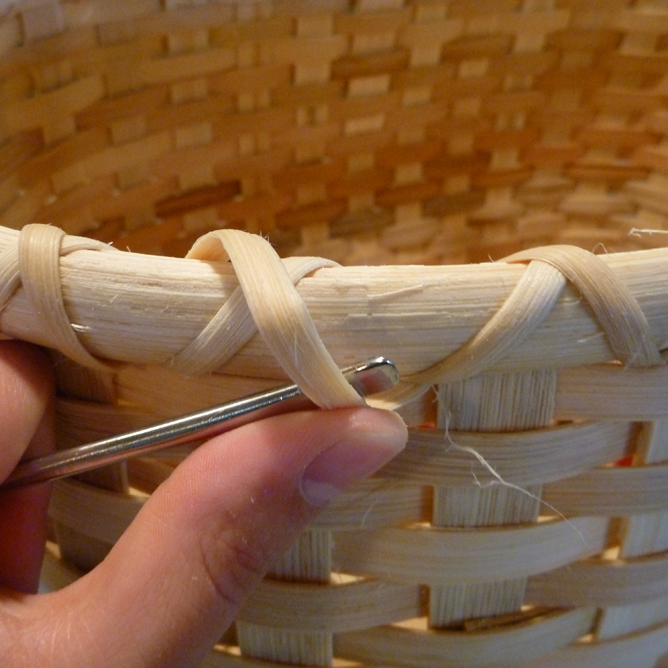
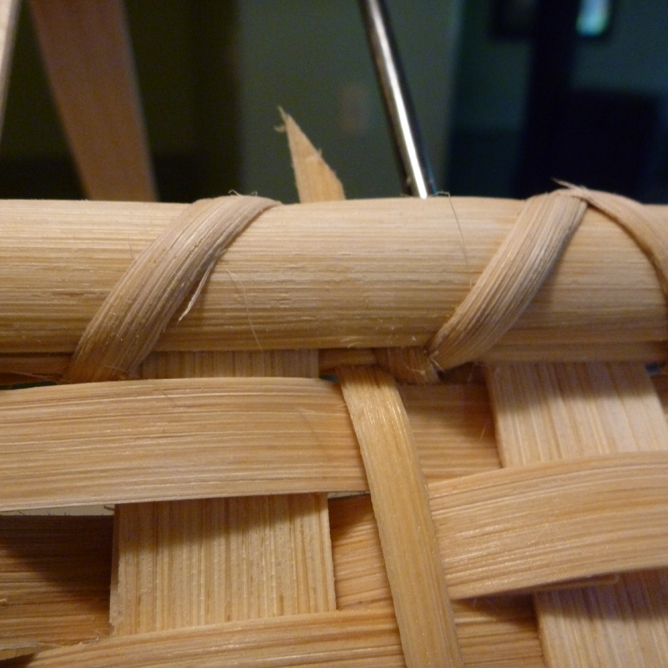
Step 11: Use the flat-tip weaving tool to open a space between two stakes and under the last row of 3/8” flat reed weaving. Without any twists, loop the end of the lasher over the rim and through the opened space from the inside of the basket to the outside. The first stitch of lashing needs to catch the tail end of the outside rim to hold it in place.
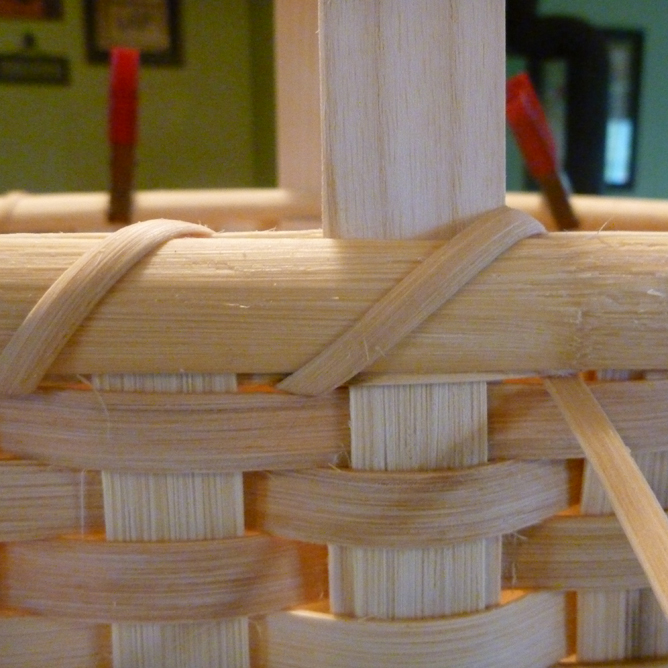
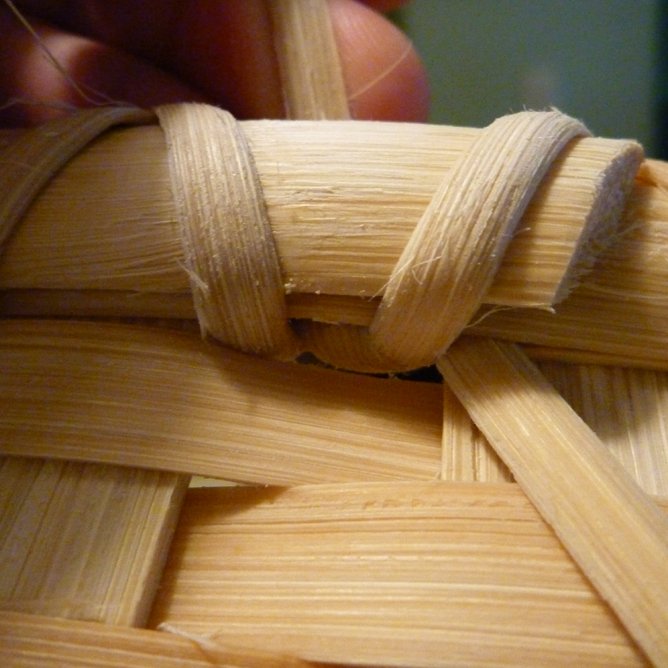
Step 12: Continue opening a space just to the right of the previous space and loop the lasher through from the inside out. Repeat this until you come to the handle. (You will need to go back later and tighten each loop so the lasher holds all of the rim pieces together very snugly.) Continue over the handle without forming an X.
Step 13: Continue looping the lasher through the next space to the right until you return to the same space where the lasher began.
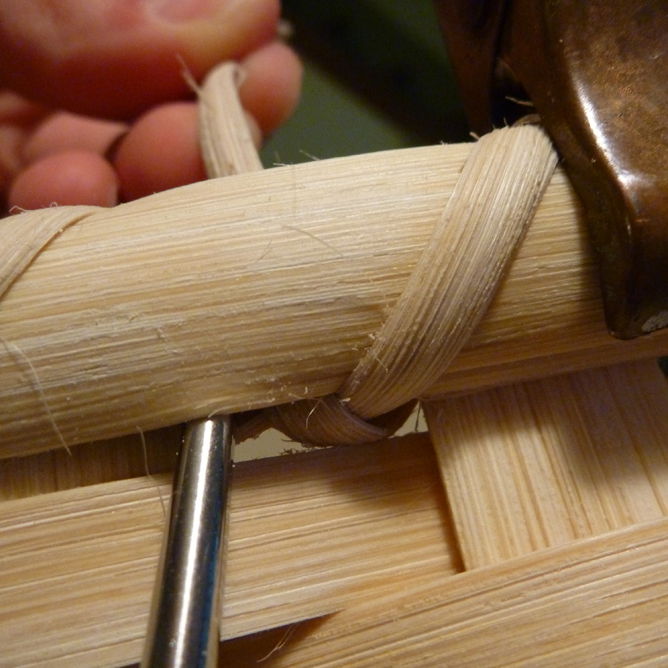
Step 14: Now go back to the beginning of the lasher and tighten each loop.
Your left hand should squeeze the rims together while using the flat-tip tool to pull slack towards the right. Be careful to avoid placing too much pressure on the lasher with the flat-tip tool as the reed might break!
Step 15: Once you’ve tightened the lasher all the way around to the starting point, you are ready to lash back around the basket in the clockwise direction.
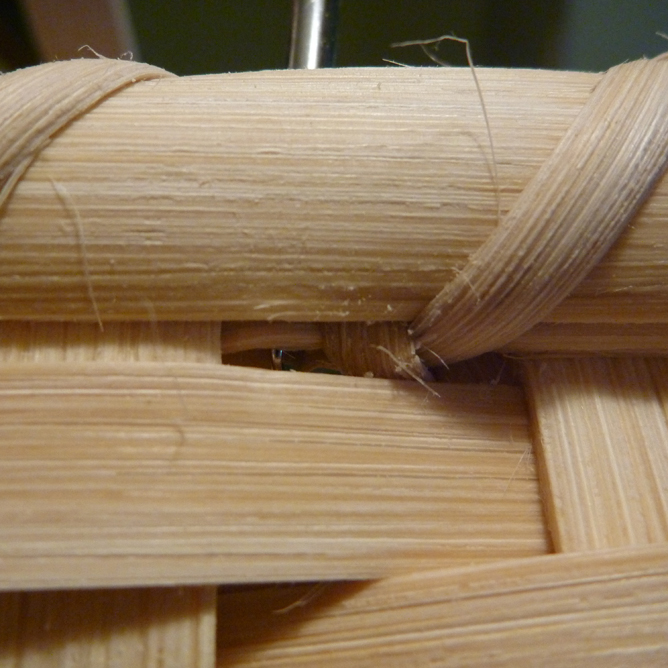
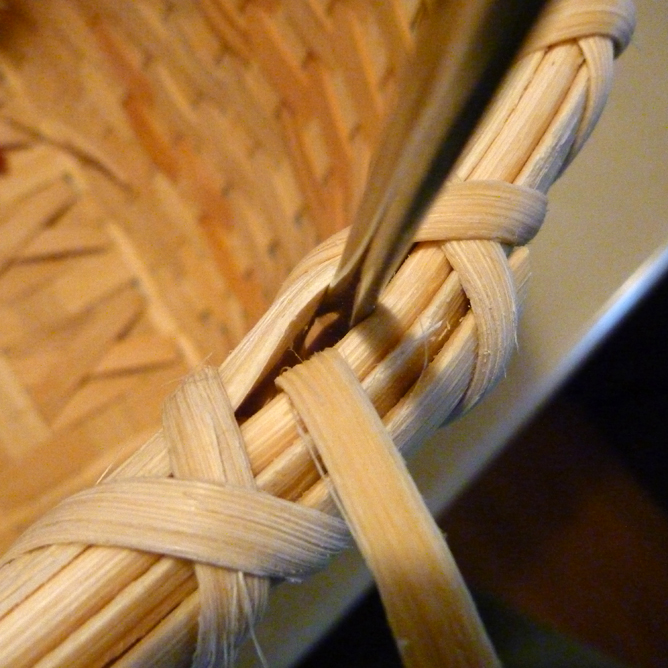
If you have remaining lasher from your first piece (more than 12 inches), simply loop the lasher over the previous stake to the left - clockwise. You’ll be overlapping the first counter-clockwise row of lashing you just tightened. Try to cross the second row in a neat “X” over the top of the first lashing row.
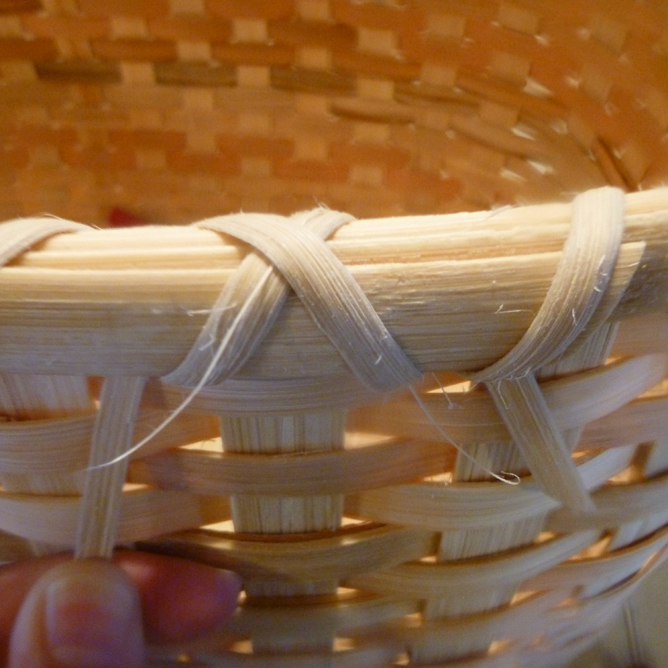
Reminder: You will be going back to tighten the second row of lashing once you reach the end of your lasher.
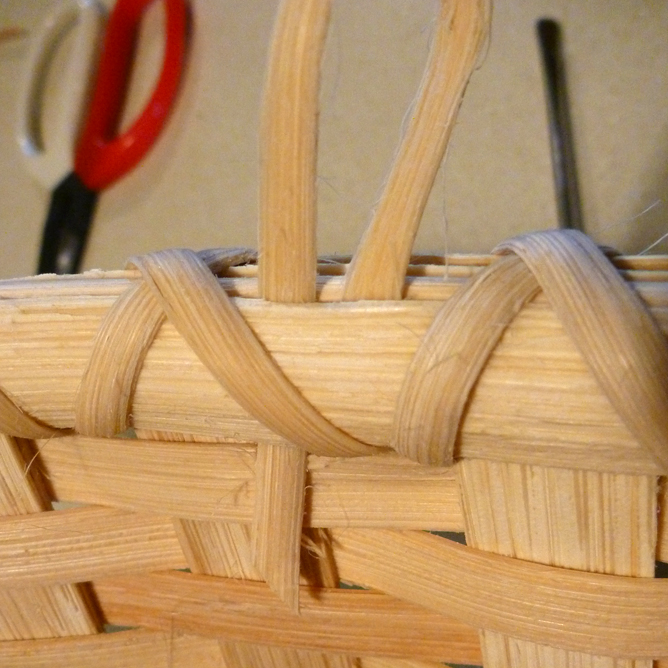
Step 16: Continue doing this as far as the lasher will reach around the clockwise direction of the basket. Remember to treat the handle just like another stake.
Step 17: Chances are, your first lasher won’t be long enough to complete the whole second row of the rim.
Once there is only about 6 inches remaining on the tail of your first lasher, you’ll need to end this lasher and begin the second. This is done by forming a fishhook in between two stakes. Before you do that, go back and tighten the second row of lashing.
Step 18: Once all the slack is removed from the loops, you are ready to “lose the lasher”. This term refers to the process of hiding the lasher inside of the two rims while holding the lasher in place. Begin by inserting the flat-tip tool in between two stakes on the outside of the last row of 3/8” flat reed weaving. Slide the end of the lasher up through that opening.
Pull the slack tight.
Step 19: Now work from the top of the rim to insert the flat-tip tool between the two rims, but this time on the inside (opposite) of the 3/8” flat reed.
Slide the lasher through that opening, being sure to avoid looping the lasher over the rim filler. Pull the slack tight. You’ve lost the lasher!
Step 20: Now you’ll need to start another lasher in the same space where you just lost your lasher. Form another fishhook by inserting the flat-tipped tool up behind the row of 3/8” weaver. Slide the clipped second piece of lasher up into that opening.
Then use the tool to open a space on the outside of the 3/8” weaver, and slide the short tail of the second lasher down in between the rims. (Make sure you loop it under the rim filler.)

Pull it down inside the rims so it can’t be seen.
Step 21: Continue on to loop the second lasher all the way around the rest of the basket until you reach the original hole of the first lasher. Go back and tighten the lasher.
Step 22: Lose the lasher here using the same process in steps 18 and 19.
(This is what it looks like from the inside of the basket.)
Step 23: Clip the ends of the rims to be flush with the lasher. Clip the lasher tails with ¼” left, and your basket is rimmed!
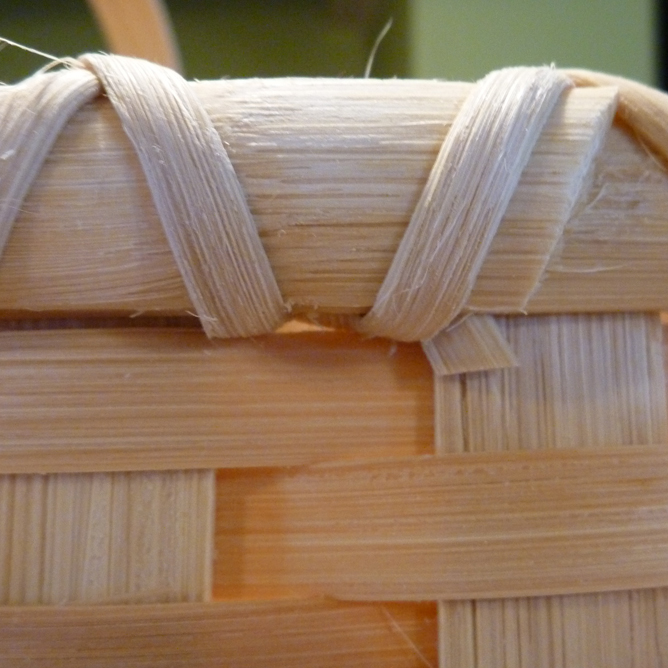
Nicely done!

Recent Comments
Share This


Recent Entries
- Basket Finishes
- August ‘26 - Free Pattern
- July ‘26 Free Pattern
- June ‘26 Pattern
- May ‘26 Pattern
- View Archive
Categories
Weaving Lessons
- Basket Finishes
- Staining Tutorial - With or Without Leather
- Weaving with a Wooden-Bottom Base Tutorial
- Wire and Bale Handles
- Weaving with Leather Handles
- Twining a Round Base Tutorial
- Leather Handled Tote Strapping Tutorial
- Singeing Tutorial
- Twining the Last Weaver Tutorial
- Sea Grass Continuous Weave Tutorial
- To stain or not to stain … that is the question!
- Shaping the Sides of a Basket Tutorial
- Double-Lashing Tutorial
- Clip and Tuck Tutorial
- Weaving the Sides Tutorial
The Basket Blog
Basket Finishes
August ‘26 - Free Pattern
July ‘26 Free Pattern
Details & Such
Wholesale Inquiry?
If you are interested in wholesale pricing, please .(JavaScript must be enabled to view this email address) that has "wholesale inquiry" in the subject field.
Contact Information
.(JavaScript must be enabled to view this email address)
1422 Martha St N
Stillwater, MN 55082

Weaving Lessons
- Basket Finishes
- Staining Tutorial - With or Without Leather
- Weaving with a Wooden-Bottom Base Tutorial
- Wire and Bale Handles
- Weaving with Leather Handles
- Twining a Round Base Tutorial
- Leather Handled Tote Strapping Tutorial
- Singeing Tutorial
- Twining the Last Weaver Tutorial
- Sea Grass Continuous Weave Tutorial
- To stain or not to stain … that is the question!
- Shaping the Sides of a Basket Tutorial
- Double-Lashing Tutorial
- Clip and Tuck Tutorial
- Weaving the Sides Tutorial
This is a very helpful tutorial. I appreciate the tips of where to place the overlaps of the rims. Great help too in hiding the lasher.
Lori Ammerman 10/29/13