Wire and Bale Handles
Hello, Weaving Friends!
As the spring months fight for recognition here in northern Minnesota, we are beginning to look forward to more time spent outside. It will be summer before you know it! When we finally can start hanging the laundry outside again, we use a basket like this Clothespin Basket to keep all the pins in one place.
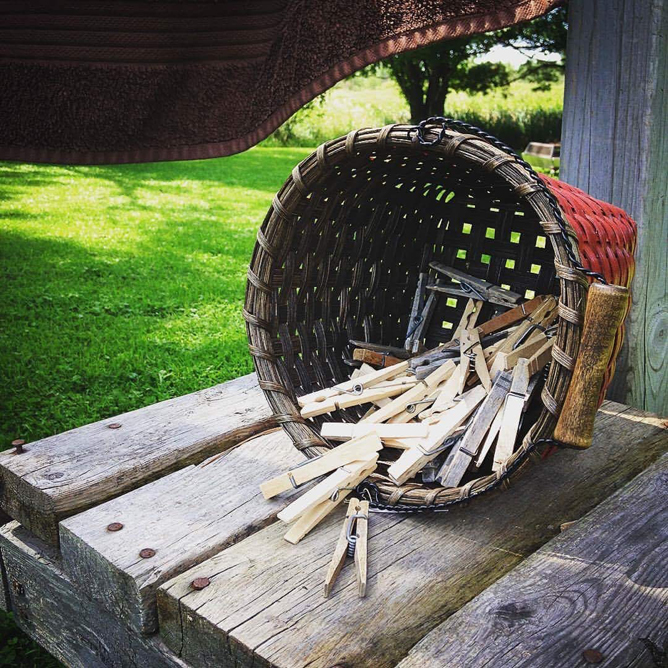
This tutorial will demonstrate how to weave any pattern that includes a wire and bale handle, like in the Clothespin Basket. It’s fairly simply to add the wire ears to anchor the handle once you can see the inside of the basket’s rim. So here we go!
The first step is to weave the basket as your pattern calls all the way up to the clip and tuck stage. That means you’ve completed all the weavers on the sides, and you’re ready to finish anchoring the stakes right before adding the rim on your project.
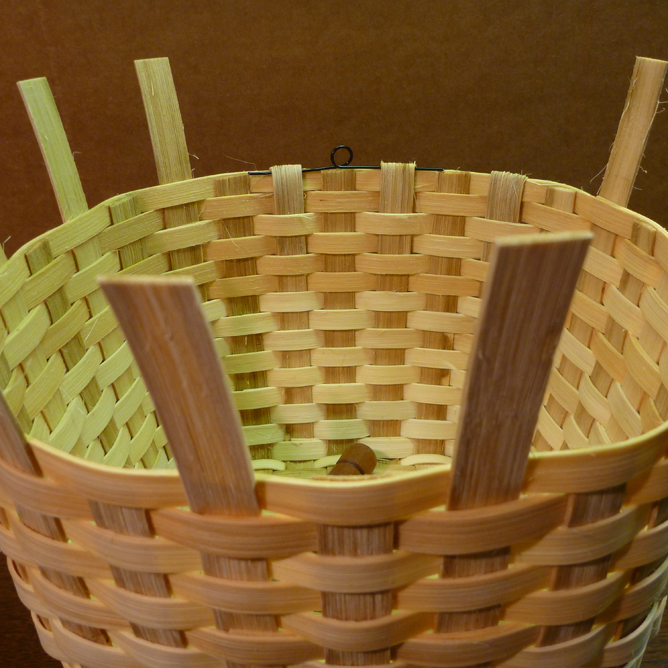
Clip all of the inside stakes like normal – at or just below the last weaver. Don’t tuck the outside stakes yet, though.
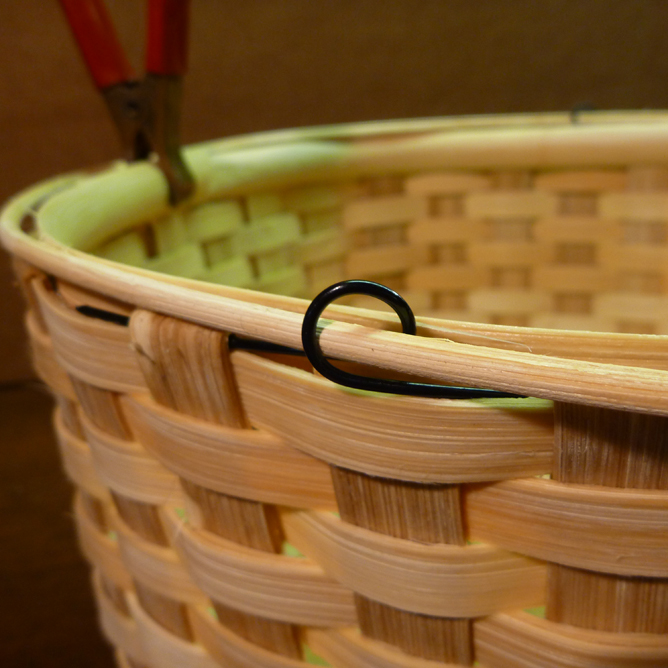
In most patterns, the wire ears (the three to four inch long pieces of wire with a small loop in the center) need to be positioned opposite of each other over a cut stake. Bend the ears ever so slightly to follow the shape of the side and pin the loop directly over the cut center stake.
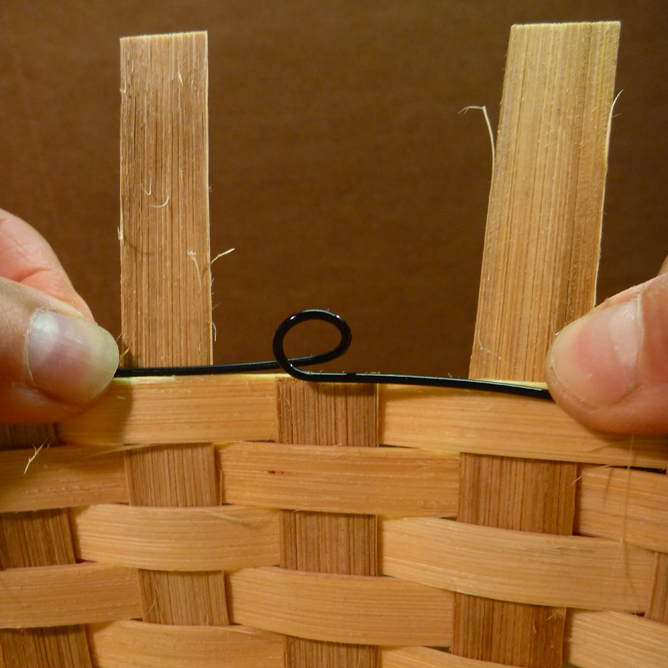
Fold the outer stake over to measure where to clip and tuck it on the inside. Be careful to keep the wire ear on top of the last row of weaving. It likes to slip down inside the basket during this step.
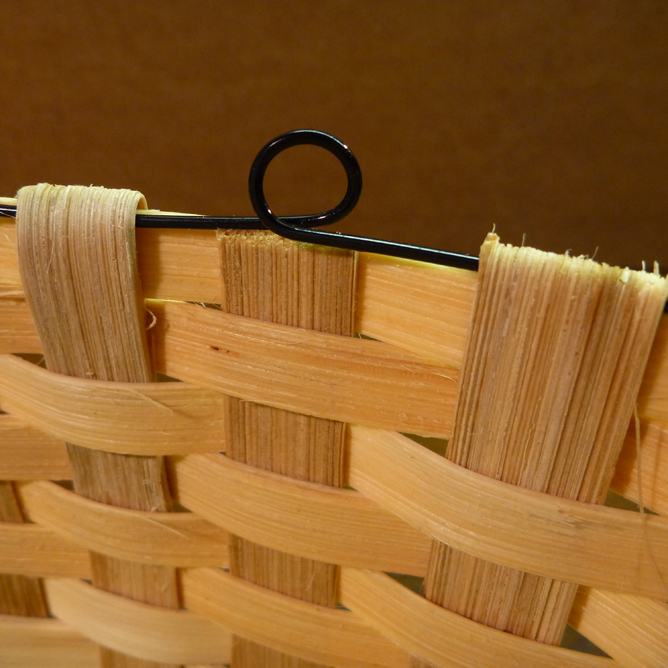
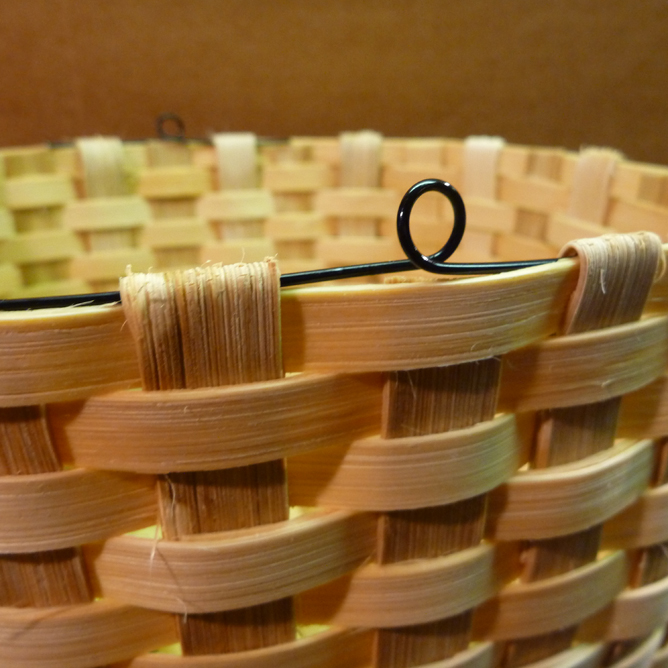
Tuck the wire ear in the outer stakes to the right and left of the center cut stake.
Repeat on the other side.
This is what the wire ear looks like from the outside of the basket.
Now begin the single-lashing process by positioning the inside rim just like normal. Usually, we like to begin the inside rim a quarter turn away from where the ears are. That prevents the bulky overlap from landing right on the wire ear.
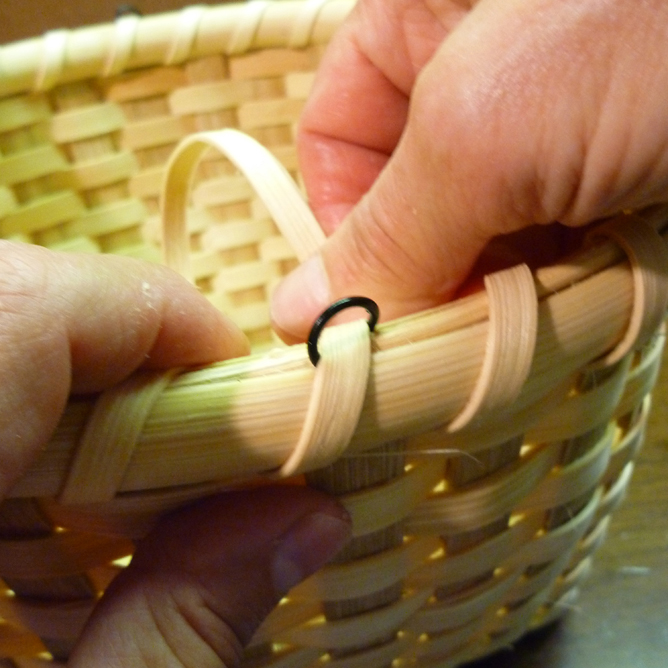
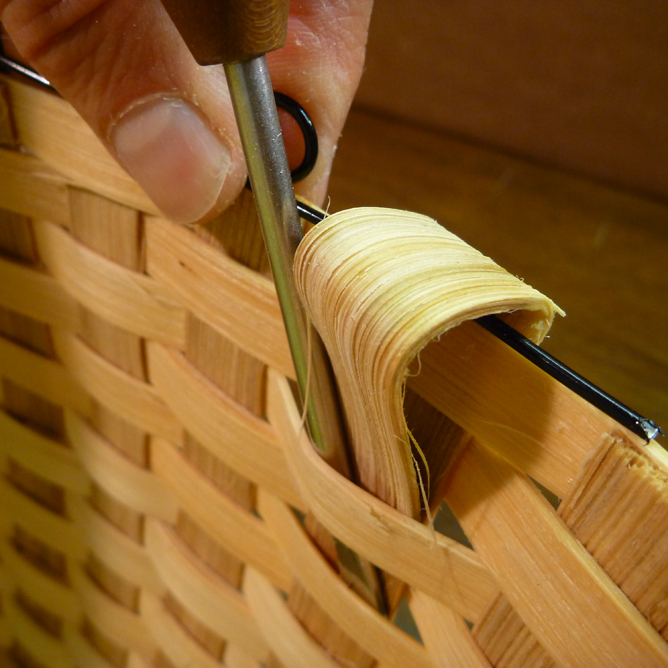
When you are ready to add the rim filler (round or sea grass), you can open up the ear loops a bit by bending it with the flat tip weaving tool or a pen. The rim filler should be inserted through the wire ear loop so it can be pinched between both rim pieces smoothly.
Continue lashing as normal, but when you get to the wire ear, lash through the loop, right over the rim filler. All of our patterns that use wire handles are single-lashed, but you don’t have to worry about crossing back to form an “x” like when you’re single-lashing over a hardwood handle.
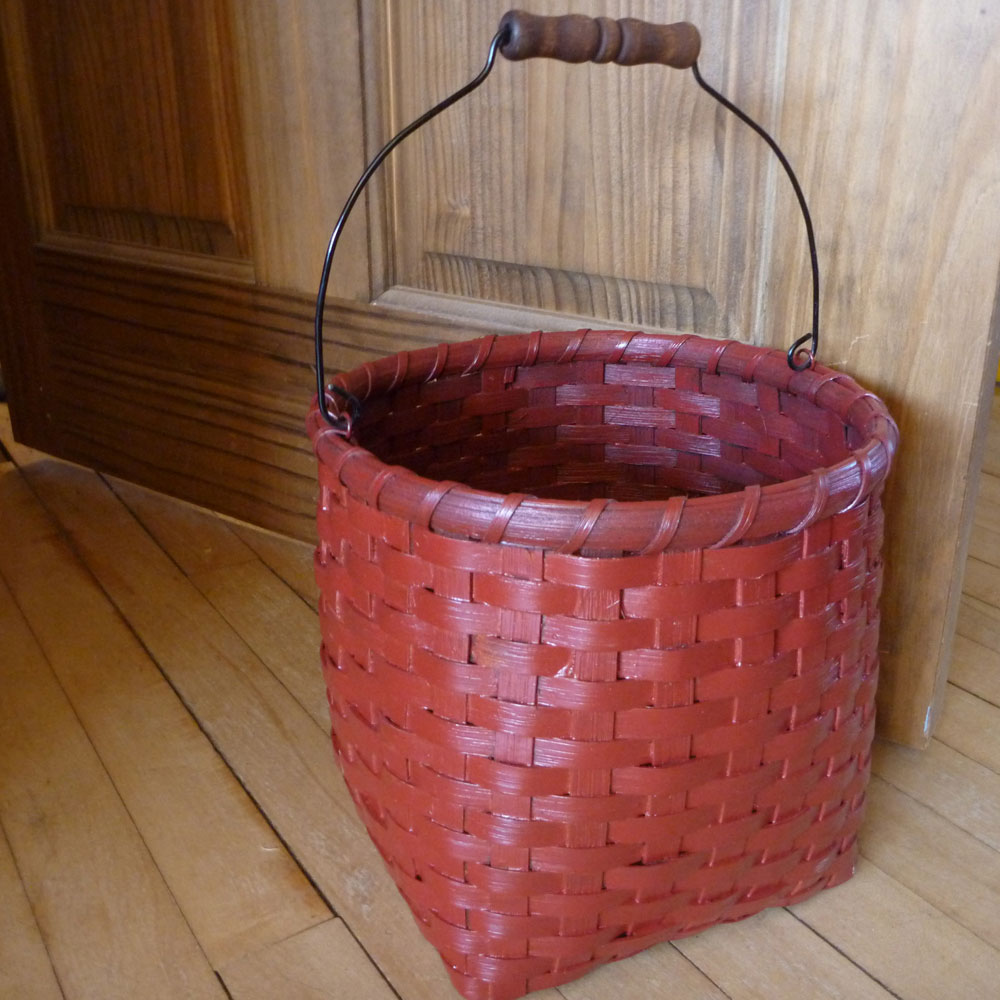
And there you go! The final step is to connect the wire handle with the anchored wire ears. Easily done, and you’re basket is finished!
Recent Comments
Thank you for such specific instructions. I’ve been weaving for 30 years and have never seen these instructions . Thanks for sharing!
This looks like it would give more support to the handle. I like the suggestion.
Nice clear instructions… thanks for sharing your knowledge!
The Basket Blog
Basket Finishes
February ‘26 Free Pattern
January ‘26 Free Pattern
Details & Such
Wholesale Inquiry?
If you are interested in wholesale pricing, please .(JavaScript must be enabled to view this email address) that has "wholesale inquiry" in the subject field.
Contact Information
.(JavaScript must be enabled to view this email address)
1422 Martha St N
Stillwater, MN 55082

Weaving Lessons
- Basket Finishes
- Staining Tutorial - With or Without Leather
- Weaving with a Wooden-Bottom Base Tutorial
- Wire and Bale Handles
- Weaving with Leather Handles
- Twining a Round Base Tutorial
- Leather Handled Tote Strapping Tutorial
- Singeing Tutorial
- Twining the Last Weaver Tutorial
- Sea Grass Continuous Weave Tutorial
- To stain or not to stain … that is the question!
- Shaping the Sides of a Basket Tutorial
- Double-Lashing Tutorial
- Clip and Tuck Tutorial
- Weaving the Sides Tutorial


Thanks for sharing.
Linda Lou 04/27/17