Laying out a Filled Base
Laying out the base is one of the very first steps in weaving a basket. This tutorial can be used in making a basket either with or without a handle. The pictures use a handle, but if your project does not include one, then simply replace the handle with your center stake.
Let’s get started!
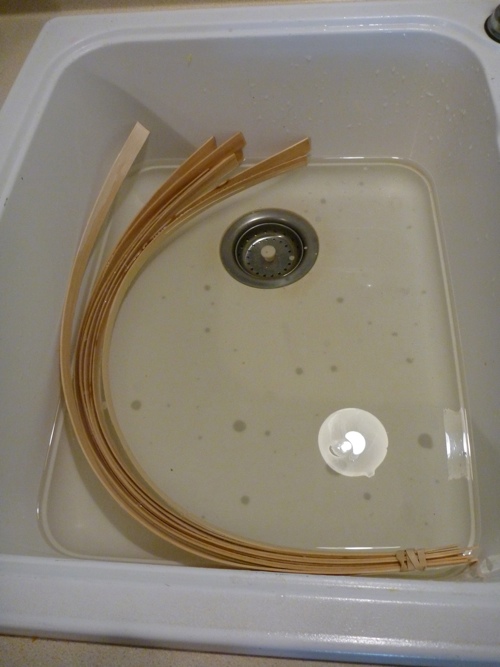
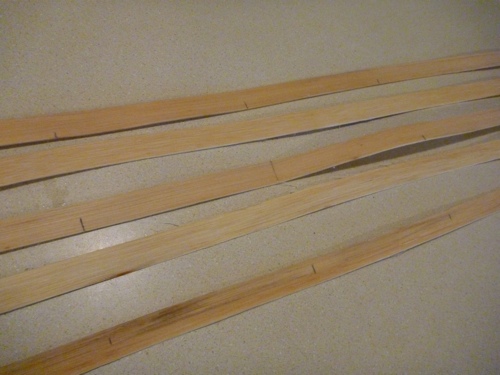
Step 1: Soak your vertical stakes, horizontal stakes, and filler pieces. Warm water works best!
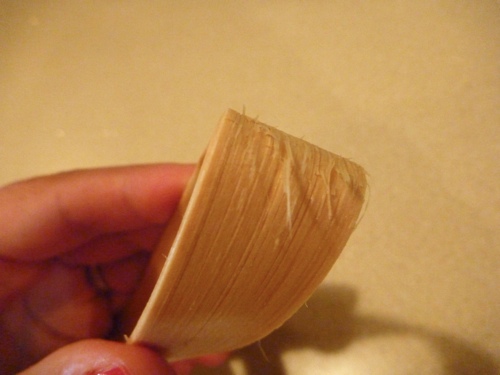
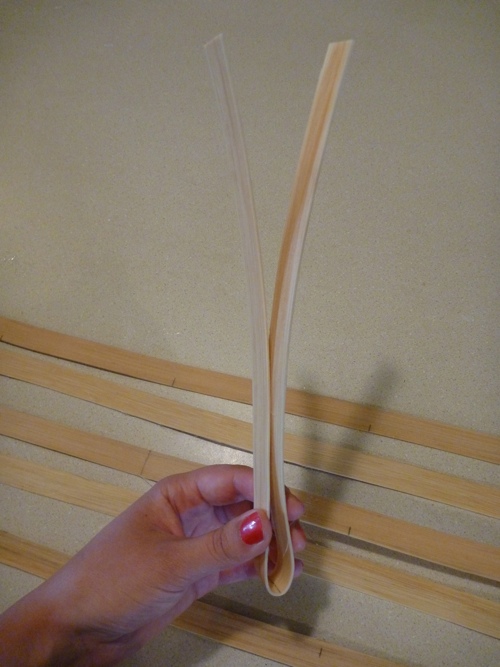
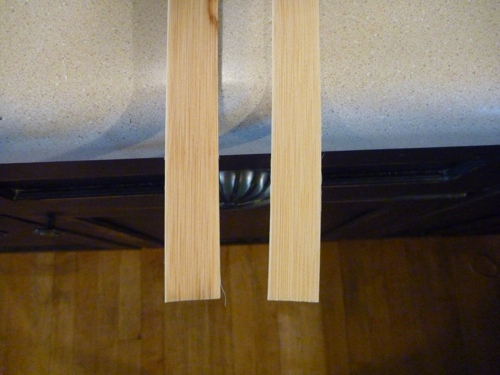
Step 2: Find the rough side of your stakes. Sometimes this is really easy. If you bend the stake over your index finger and find that one side has little splinters popping up, that’s the rough side. Place the rough side up/smooth side down on the table. Other times the reed may feel smooth on both sides, and you can’t find the rough side. If that’s the case it’s not going to matter!
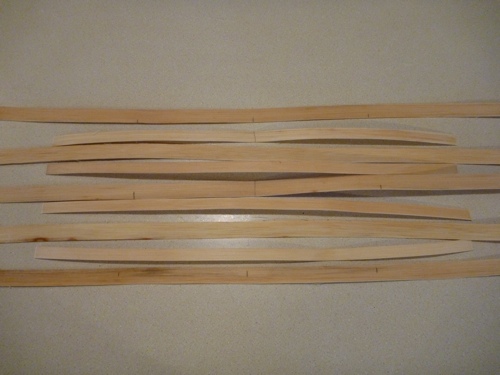
Step 3: Mark the center of the middle horizontal stake with a pencil. Match up the ends to find the center but don’t crease the middle too strongly.
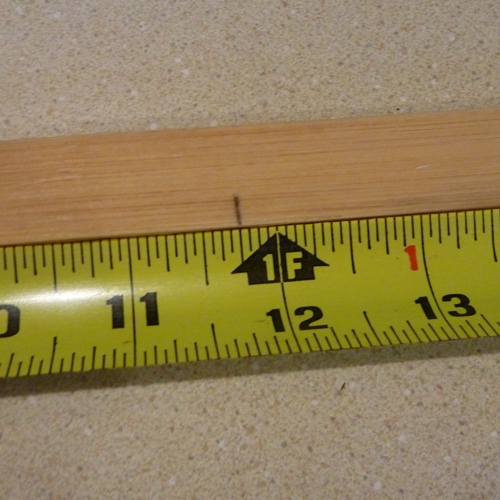
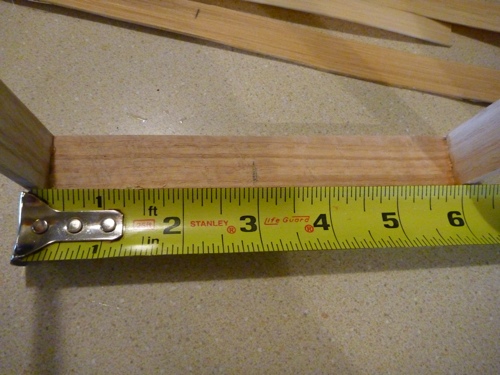
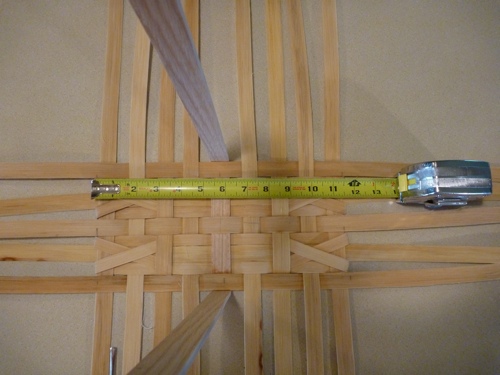
Step 4: Measure the horizontal length with this neat trick. If use of a locking row is included on your pattern, then divide the overall required length in half. On this basket, the horizontal measurement is intended to be 12”, so I lined up the center mark at 6”. I then mark a quarter inch less on each side of the total measurement. This compensates for the ¼“ locking row that will add a total of ½“ to the horizontal measurement.
Step 5: Copy that measurement onto two more of the straightest horizontal stakes to act as your outside stakes. This will help keep the correct size on the whole base after all the vertical stakes are added.
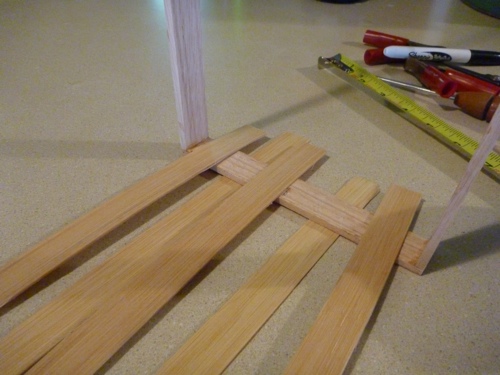
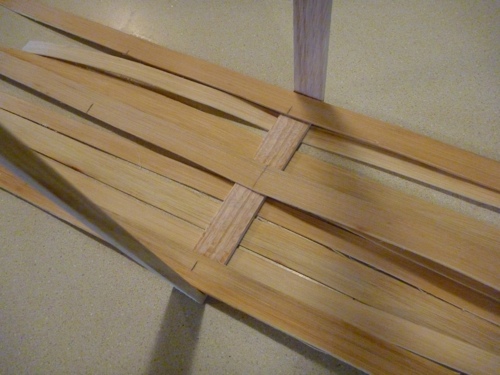
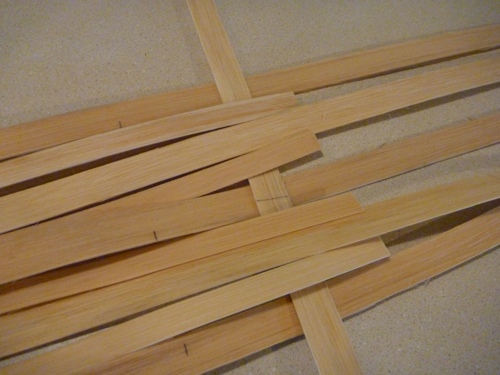
Step 6: Lay out the horizontal stakes rough sides up and find the center of the smaller fillers. Lay one filler in between each of the horizontal stakes and close the spaces between them as much as possible. They can be tightened later if need be.
Step 7: Time to add the vertical stakes! Find and mark the center of either the handle (if the basket has one) or a straight vertical stake – remembering to keep the rough side up.
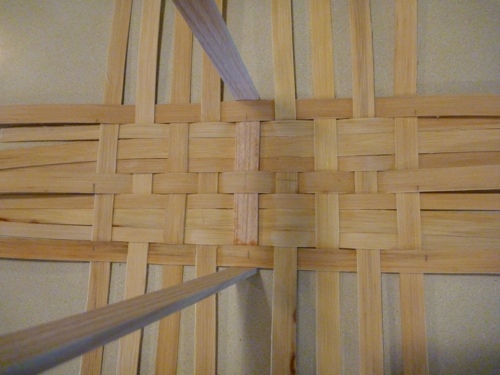
Check the pattern to see if you need to begin by lifting the odd or even horizontal stakes. In this pattern, I am instructed to lift the odds, #’s 1, 3 and 5. That means I do nothing with the fillers yet! Using your left forearm to hold all of the horizontals in place, lift the odd (or even, based on your pattern) stakes, and slide the handle or center stake under the lifted stakes and over the even stakes and their fillers.
Line it up with your center marks on the horizontal stakes, and double check to make sure they haven’t moved around too much.
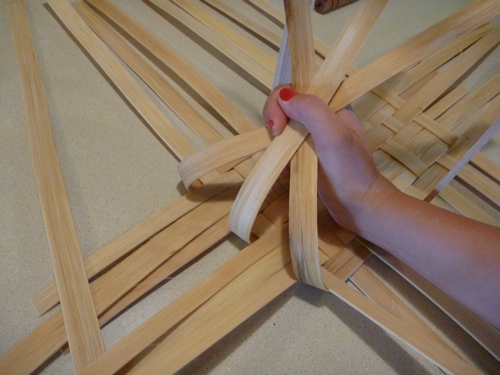
Keeping your left arm in the same place, find the rough side of your next vertical stake. According to the pattern I used, this is now where I needed to lift the fillers and even stakes #‘s 2 and 4. Remember to treat the fillers and even stakes as one unit ... if you go under stake #‘s 2 and 4, you also go under their fillers ... if you go over stake #‘s 2 and 4, you also go over their fillers.
Slide the vertical stake under the even stakes and fillers, and bring it toward the center until it’s about a fingertip apart from the center stake. You’ll need to adjust all of your vertical stakes at the end to make sure there is an equal amount of space between each of the vertical stakes.
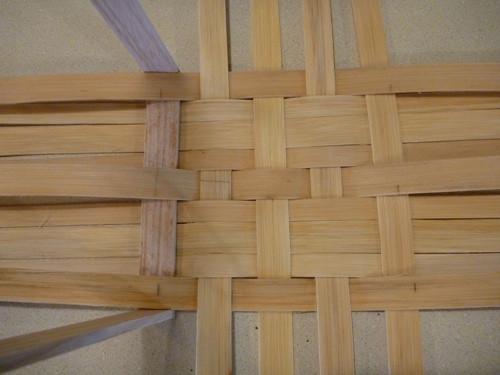
Check your pattern to see how many stakes to weave in on the left and on the right of the handle.
Once you have them all woven in, tighten or loosen up the base to line up with the end markings measured on the horizontal stakes.
Also make sure the verticals are even in length with each other. You can mark the center of each vertical stake, or you can simply eyeball them to make sure they are even.
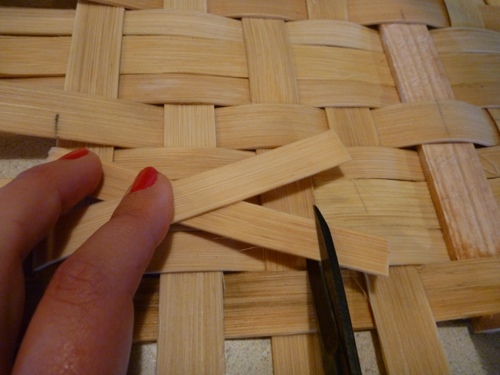
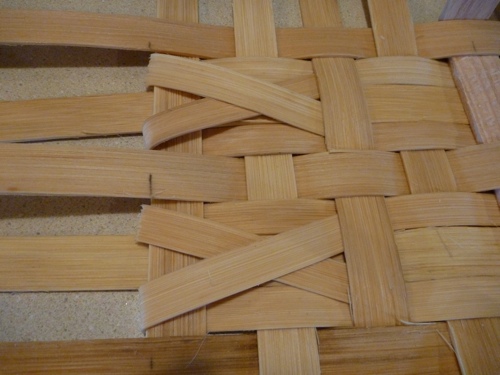
Step 8: Criss-cross fold the fillers into an “X” and clip them so they can tuck underneath the next vertical stake that is over the fillers. Do this on both sides.
When this is done, you’re ready to…
Step 9: Either move on to the locking row tutorial or the upsetting your stakes tutorial, based on what your pattern calls for!
Nicely done!
Recent Comments
Share This


Recent Entries
- Basket Finishes
- July ‘26 Free Pattern
- June ‘26 Free Pattern
- May ‘26 Pattern
- April ‘26 Pattern
- View Archive
Categories
Weaving Lessons
- Basket Finishes
- Staining Tutorial - With or Without Leather
- Weaving with a Wooden-Bottom Base Tutorial
- Wire and Bale Handles
- Weaving with Leather Handles
- Twining a Round Base Tutorial
- Leather Handled Tote Strapping Tutorial
- Singeing Tutorial
- Twining the Last Weaver Tutorial
- Sea Grass Continuous Weave Tutorial
- To stain or not to stain … that is the question!
- Shaping the Sides of a Basket Tutorial
- Double-Lashing Tutorial
- Clip and Tuck Tutorial
- Weaving the Sides Tutorial
The Basket Blog
Basket Finishes
July ‘26 Free Pattern
June ‘26 Free Pattern
Details & Such
Wholesale Inquiry?
If you are interested in wholesale pricing, please .(JavaScript must be enabled to view this email address) that has "wholesale inquiry" in the subject field.
Contact Information
.(JavaScript must be enabled to view this email address)
1422 Martha St N
Stillwater, MN 55082

Weaving Lessons
- Basket Finishes
- Staining Tutorial - With or Without Leather
- Weaving with a Wooden-Bottom Base Tutorial
- Wire and Bale Handles
- Weaving with Leather Handles
- Twining a Round Base Tutorial
- Leather Handled Tote Strapping Tutorial
- Singeing Tutorial
- Twining the Last Weaver Tutorial
- Sea Grass Continuous Weave Tutorial
- To stain or not to stain … that is the question!
- Shaping the Sides of a Basket Tutorial
- Double-Lashing Tutorial
- Clip and Tuck Tutorial
- Weaving the Sides Tutorial
I have never seen this technique; I love it and plan to try it. Thank you for sharing such valuable information.
Lynn 09/03/13